


Table of Contents Show
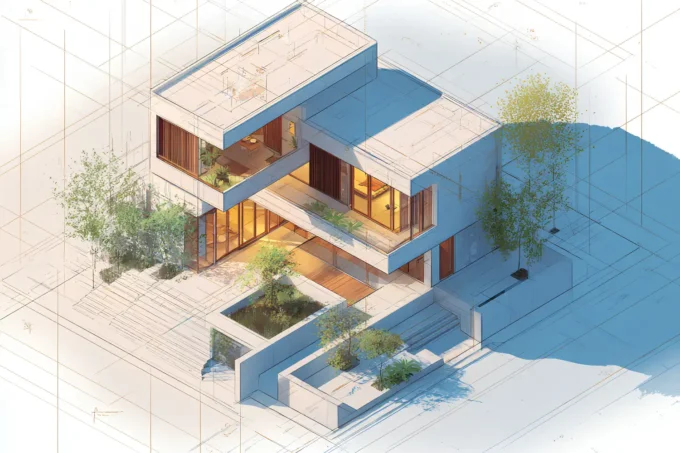
Creating stunning floor plan renderings in Photoshop can elevate our architectural presentations to a whole new level. Whether we’re architects, designers, or enthusiasts, mastering these techniques allows us to communicate our ideas more effectively and impress clients with detailed, realistic visuals.
Understanding Photoshop Floor Plan Rendering
Rendering floor plans in Photoshop involves combining various design elements to create realistic and detailed visuals. By mastering these techniques, we can enhance our architectural presentations and effectively communicate our designs to clients.

Setting Up Your Workspace
A well-organized workspace speeds up the rendering process. We should create custom palettes and arrange our tools in a way that aligns with our workflow. Using multiple layers for different elements, such as walls and furniture, helps manage complex designs.
Importing Floor Plans
Import floor plans into Photoshop for editing. Use high-resolution images to maintain clarity and detail. It’s crucial to ensure the imported floor plan is to scale by using the measurement tools available in Photoshop.
Layer Management
Layer management is critical for efficient rendering. Naming layers descriptively helps locate specific elements quickly. Group related layers to maintain an organized file structure. For instance, group layers for interiors separate from structural elements.
Applying Textures
Realistic textures bring floor plans to life. Download high-resolution textures for elements like wood, tiles, and carpet. Use the ‘Pattern Overlay’ and ‘Texture’ options to apply these textures consistently across surfaces.
Adding Lighting and Shadows
Lighting and shadows add depth and realism to renderings. Utilize the ‘Gradient Tool’ and ‘Drop Shadow’ effects to simulate natural light. Adjust the opacity and angle of shadows to match the light source.

Using Brushes for Detailing
Custom brushes enhance detailing in floor plans. Create or download brushes that mimic natural elements like grass and trees. Use brushes to add texture and depth to areas like gardens and pathways.
Annotating and Labeling
Annotations and labels provide clarity. Use the ‘Text Tool’ to add descriptions, dimensions, and labels to different parts of the floor plan. Choose fonts and colors that are legible and contrast well with the background.
Exporting the Final Render
Export the final render in high resolution. Use formats like PNG or PDF to preserve quality. Ensure the file settings match the intended presentation medium, whether for print or digital displays.
Understanding these Photoshop floor plan rendering techniques allows us to produce professional and impressive presentations that capture the essence of our designs.
Essential Tools and Resources
To render floor plans effectively in Photoshop, we need access to the right tools and resources. These tools help streamline workflows and enhance the quality of our renderings.
Software and Plugins
Photoshop remains the primary software for floor plan rendering. For additional functionality, we recommend specific plugins:
- GuideGuide: Assists with creating grids and layouts accurately, ensuring precise alignment.
- MagicPicker: Offers advanced color picking and palette management for seamless color harmony.
- PixelSquid: Provides access to a library of 3D objects that can be integrated into floor plans for added realism.
These plugins enhance Photoshop’s capabilities, making the rendering process more efficient.
Reference Materials
Effective floor plan renderings require accurate reference materials:
- Blueprints and CAD Drawings: Original blueprints or CAD files provide the foundational details and dimensions necessary for accurate renderings.
- Material Samples: Physical or digital samples of flooring, paint, and furniture help replicate textures and finishes.
- Lighting References: Images or diagrams of lighting setups inform appropriate shadow and highlight placements.
Access to these reference materials ensures our renderings are both realistic and precise, directly reflecting the intended design.

Basic Techniques for Floor Plan Rendering
Understanding basic techniques is essential to create impressive floor plan renderings in Photoshop. Here, we cover key steps to optimize your workflow and achieve superior results.
Layer Management
Organizing layers keeps your workflow efficient. We suggest grouping layers by their function, such as walls, furniture, and annotations. Naming each layer descriptively helps locate elements quickly. Adjustment layers are valuable; using them for non-destructive edits increases flexibility when tweaking colors or shadows.
Using Guides and Grids
Accurate alignment is crucial for floor plans. Photoshop’s guides and grids are indispensable for this purpose. Guides ensure elements align precisely; we can drag them from the rulers, or use the GuideGuide plugin for more control. Grids assist in maintaining proportions and scale, which is key when working with architectural elements.
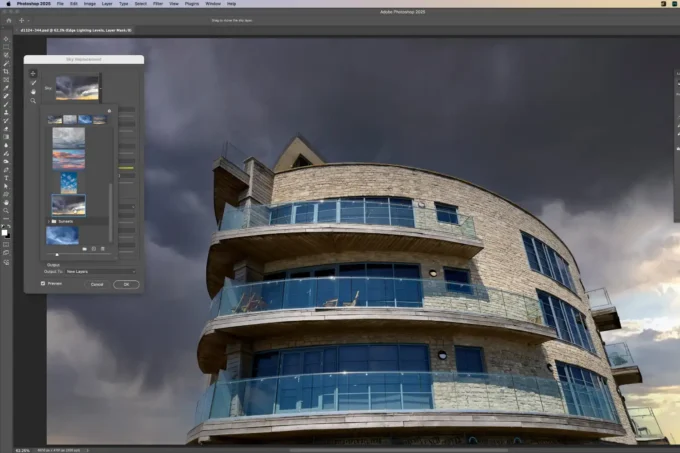
Image Import and Export
High-quality sources and outputs are vital in rendering. Importing CAD drawings or blueprints as base layers provides an accurate starting point. Ensuring these images are high resolution prevents loss of detail during scaling. When exporting, choosing the right format (typically PNG or TIFF for clarity) and resolution (300 dpi for print, 72 dpi for web) ensures your renderings maintain their quality across different media.
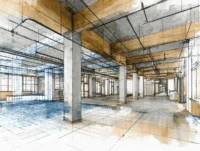
Advanced Rendering Tricks
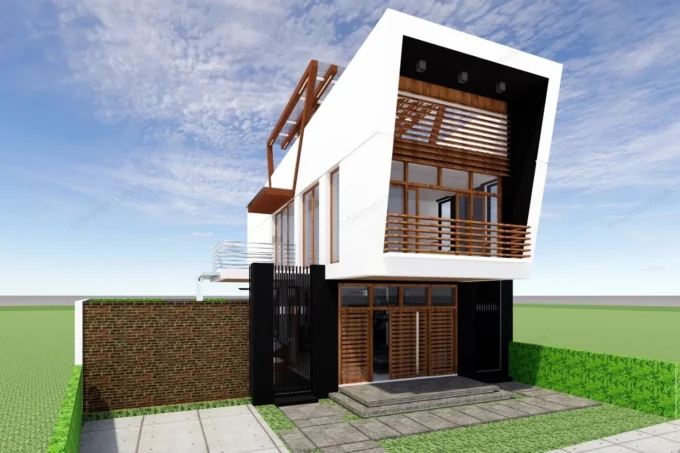
To elevate our floor plan renderings, it’s essential to master advanced techniques that make the designs more realistic and engaging. Here are some tricks involving texturing, lighting, adding furniture, and creating 3D effects.
Adding Furniture and Fixtures
Integrate furniture and fixtures seamlessly. Source 2D elements from resources like PixelSquid or create custom graphics. Match the perspective and scale of the floor plan. Utilize the Transform tool to adjust size and orientation precisely. Group related elements to maintain an organized layer structure. Apply layer styles such as shadows and glows to add depth and realism. Refer to design guidelines for accurate placement and scale.
Creating 3D Effects
Enhance depth through 3D effects. Use the 3D workspace in Photoshop to create extrusions of floor plan elements. Apply perspective and vanishing point tools to achieve accurate angles. Add depth with gradient shading and beveled edges. Import or create 3D models of architectural features for added realism. Adjust lighting and shadows within the 3D space to match the overall floor plan’s ambiance.

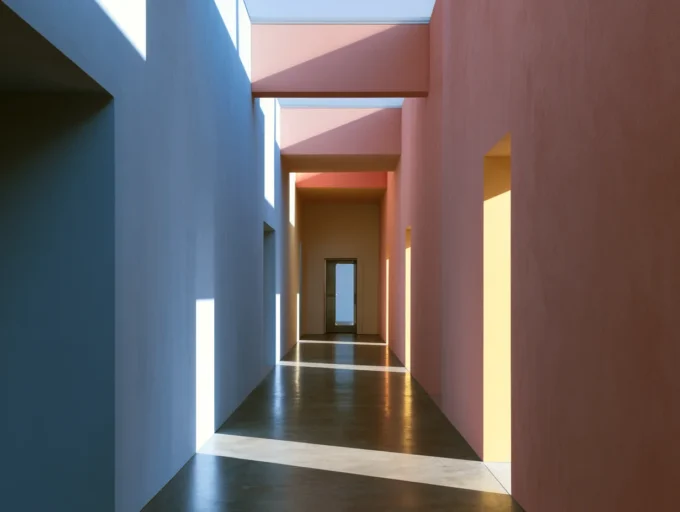
Enhancing Details
Detailed floor plans make architectural presentations stand out. Enhancing these details with Photoshop involves shadow and highlight techniques, color correction, and annotations.
Shadow and Highlight Techniques
Shadows and highlights add realism. Shadows indicate depth and define spatial relationships. Use the Burn Tool to deepen existing shadows and the Dodge Tool to increase brightness. To add custom shadows, create a new layer, paint them using a soft brush, and adjust the opacity as needed. For highlights, use a light color with a low-opacity brush to subtly illuminate key areas.
Color Correction and Adjustment
Accurate colors make plans visually appealing. Use the Curves adjustment layer to tweak brightness and contrast. The Hue/Saturation tool can adjust hue, saturation, and lightness for different areas. Use the Color Balance tool to fine-tune shadows, midtones, and highlights. Consistent color grading ensures all elements look cohesive.
Annotating Plans
Annotations provide context. Use the Text Tool for dimensions and labels. Create a new layer for annotations to keep them organized. Use different font sizes and colors to differentiate between types of information. Arrowheads and callouts can guide viewers’ attention to critical details. In large plans, a legend can help clarify symbols and notations.
Additional Tips
-Consistently check: Regularly compare your Photoshop rendering to original blueprints or CAD drawings to ensure accuracy.
-Use styles: Layer styles, such as Stroke or Drop Shadow, can add emphasis to specific elements.
-Save presets: Save color correction presets to maintain uniformity across different projects.
Common Mistakes to Avoid
Avoiding common mistakes ensures our Photoshop floor plan renderings are effective and professional. We should pay close attention to these key areas to prevent issues that can detract from our work.
Incorrect Layer Management
Disorganized layers can make our workflow chaotic. Each element should be on a separate layer for easy adjustments. Using descriptive names rather than default names like “Layer 1” helps maintain clarity.
Ignoring Resolution and DPI
Low resolution (less than 300 DPI) results in poor quality printouts. Rendering at high resolution from the start saves time and prevents pixelation. Always set the correct DPI before beginning the project.
Skipping Reference Materials
Not using accurate reference materials like blueprints and CAD drawings leads to inaccurate renderings. Always cross-check our work with these references to maintain accuracy.
Neglecting Lighting and Shadows
Flat images without lighting and shadow adjustments appear unrealistic. Always apply shadows and highlight techniques to add depth and realism.
Misusing Textures
Overusing or misapplying textures makes floor plans look cluttered. Stick to high-quality textures and apply them appropriately. Textures should enhance, not overwhelm, our renderings.
Overcomplicating Designs
Adding too many details can confuse viewers. Simple, clean designs are more effective. Focus on essential elements and avoid overloading the floor plan with excessive details.
Failing to Save Progress
Not saving work regularly risks losing hours of effort. Use shortcuts like Ctrl+S to save frequently. Implement a consistent saving schedule to protect our progress from unexpected issues.
By addressing these common mistakes, we improve the quality and professionalism of our Photoshop floor plan renderings.
Conclusion
Photoshop floor plan rendering techniques can dramatically improve the quality of architectural presentations. Mastering key elements such as workspace organization, layer management, and essential tools enables us to create stunning visuals. Our attention to using accurate reference materials, like blueprints and CAD drawings, ensures precision and authenticity.
Advanced tricks, including expert texturing, lighting effects, and incorporating realistic furniture, elevate our designs. We should also incorporate 3D effects for a more engaging representation. Common mistakes, such as improper layer management, overlooking resolution settings, neglecting reference materials, ignoring lighting and shadows, misapplying textures, complicating designs, and not saving progress, can detract from our work. Addressing these pitfalls helps us maintain and enhance the quality of our renderings.
By consistently applying these Photoshop techniques and avoiding common errors, our floor plan renderings will stand out, showcasing our professionalism and skill.
- 3D floor plan rendering
- advanced Photoshop floor plans
- architectural rendering techniques
- floor plan design Photoshop
- floor plan rendering software
- floor plan rendering techniques
- floor plan rendering tutorials
- Photoshop architectural visualization
- Photoshop creative floor plans
- Photoshop design tricks
- Photoshop floor plan rendering
- Photoshop home design
- Photoshop interior design
- Photoshop rendering tips
- professional floor plan rendering
- realistic floor plan rendering
- stunning floor plan designs


Leave a comment