

Table of Contents Show
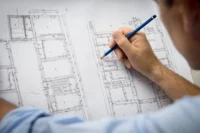
Architectural model making remains an invaluable skill, even in our high-tech age dominated by virtual reality and superb visualization software. Physical models offer a tangible experience that digital renderings can’t match. They allow us to explore designs in a way that’s more engaging and comprehensive, especially for those without a design background.
Essential Tools for Architectural Model Making
Choosing the Right Cutting Tools
Selecting appropriate cutting tools is crucial for achieving clean lines and precise edges in architectural models. Cutting knives like the Olfa 9mm and X-Acto are popular choices due to their adjustable blade lengths, which facilitate detailed work. Scissors, such as those from Fiskars, offer control for cutting small details. Metal rulers, available in lengths of 6, 12, and 18 inches, ensure straight slices. For added stability, attach masking tape to the ruler’s back when working with loose materials. Don’t forget the self-healing cutting mat, which protects cutting blades from dulling and provides a durable surface for repeated use.
Importance of Precision in Assembly
Precision in assembly ensures that architectural models are both structurally sound and visually appealing. A glue syringe allows for accurate application of smaller glue amounts, ideal for intricate areas. Glue guns provide quick-drying bonds, although they’re better suited for non-metallic materials. Masking tape is perfect for holding pieces in place while glue dries, and double-sided tape can temporarily bond components, but be cautious as it may tear card or paper upon removal. L-square stainless steel rulers help maintain straight corners and accurate draws, providing the precision needed for professional model making.
Using these essential tools with care and precision significantly enhances the quality and accuracy of your architectural models.

Selecting Materials for Your Model
Commonly Used Materials
In architectural model making, the choice of materials significantly impacts the final presentation. Foam is the primary base material, common in various thicknesses, including 3mm and 5mm. Foam boards can serve as the foundation for models crafted from other light materials or be used to construct walls, with thickness selection based on scale. For instance, less visible interior walls don’t require consistency in thickness.
Card and Paper are versatile materials often used for intricate details and roofing. Corrugated paper sheets can represent roof textures and some wall finishes. Foam core boards are also popular for their lightweight and sturdy properties.
Wooden Sheets offer a more premium finish for high-detail models. Balsa wood and basswood are easy to cut and shape, making them ideal for detailed work.
Plastic Sheets and Acrylics provide a modern and polished look, perfect for final presentation models. These materials can be laser-cut for precision.
Selecting Durable Materials
Choosing durable materials ensures your model withstands handling and transportation. Foam boards, while lightweight, offer a solid base but may require reinforcement with sturdy materials like wooden sheets for structural elements.
Using Balsa Wood provides durability with ease of manipulation. Its light weight doesn’t compromise strength, making it suitable for both base and detailed structures.
For more permanence, Acrylics are ideal. They give a sleek appearance and resist wear and tear better than paper-based materials. Laser cutting these materials enhances precision in complex designs.
In budget-constrained projects, Cardboard serves well. It’s cheap and easy to work with, though less durable than other options. For critical models, investing in higher-end materials like Plastic Sheets ensures longevity and superior aesthetic appeal.

Techniques and Tips for Model Making
Basic Model Making Techniques
Using proper basic techniques can enhance the quality of architectural models. Here are essential methods we recommend:
- Precision Cutting: Use a sharp knife and a metal ruler for clean, straight cuts. Attach masking tape to the back of the ruler to stabilize it on loose materials. Different lengths, such as 6, 12, and 18 inches, provide versatility.
- Self-Healing Cutting Mat: Protect your cutting blades and workspace with a self-healing cutting mat. This mat prevents blade dulling and keeps your work surface unmarred.
- Glue Application: Choose the right glue for your materials. Glue sticks work well for paper, white glue provides a strong bond but takes time to dry, and tacky glue dries faster and stronger than white glue. For precision, fill liquid glue into a glue syringe.
- Tape Use: Double-sided tape is ideal for attaching card or paper but handle it carefully to avoid tearing. Masking tape helps hold models in place while the glue dries.
Advanced Techniques for Detailing
Advanced techniques add realism and detail to architectural models. These methods can elevate the overall presentation.
- Laser Cutting: Use laser cutting for intricate details. This technique provides precision and consistency, ideal for small, complex components.
- Hot Glue Guns: For quick-drying applications, use a hot glue gun. It ensures a strong bond but be cautious, as it can burn skin and isn’t suited for metals.
- Detailing Tools: Invest in fine-tip tools for creating textures and adding small details. Tools like dental picks and fine brushes help achieve intricate designs.
- Finishing Touches: Use fine sandpaper to smooth edges and surfaces. Paint and markers can add color details, enhancing the model’s realism.
These techniques accommodate both basic and advanced model-making needs. By using the right tools and methods, we can create detailed and high-quality architectural models.

Deciding the Scale for Your Model
Importance of Scale Accuracy
Scale accuracy is crucial in architectural model making. It dictates how the model represents the actual structure and the spatial relationships within it. If we’re creating a massing model, we use a smaller scale like 1:200 since it focuses on spatial relations and overall form rather than finer details. For a detailed section model, a larger scale such as 1:25 would be more appropriate due to the higher level of detail required. Accurate scale ensures that the model provides a realistic representation, which is essential for clarity and effectiveness in design presentations.
- Determine Purpose: Identify what the model needs to illustrate. For instance, a conceptual model benefits from a different scale than a presentation model.
- Consider Detail Level: If detailed features like doors, windows, and textures are essential, opt for a larger scale such as 1:25. Smaller scales like 1:200 are suitable for showing overall mass and spatial relationships.
- Project Scope: Account for the size and complexity of the project. A larger project may require multiple models at different scales.
- Material Constraints: Choose materials that align with the chosen scale for ease of construction and detailing.
- Reference Existing Models: Research other architectural drawings, photographs, and physical models to see what scales are commonly used for similar projects.
By following these guidelines, we ensure that our architectural models are both effective and realistic, enhancing their utility in design analysis and client presentations.
Model Presentation Strategies
Lighting Your Model Effectively
Using proper lighting enhances the visual appeal of your architectural model. LED lights, tea light candles, and fairy lights simulate realistic lighting, helping to highlight key areas and features. Testing both warm and cool light shows which effect best complements your model. Position lights strategically to create shadows and highlights, thus adding depth and realism.

Techniques for Photographing Your Model
Photographing your architectural model requires careful techniques to capture its intricacies. Begin by choosing a neutral background to avoid distractions. Use a good quality camera or smartphone with high resolution for clear images. Stabilize your camera with a tripod to avoid blurriness.
Use natural light for softer shadows, or arrange controlled artificial lighting to emphasize details. If needed, implement diffusers to soften the light and reduce harsh shadows. Capture a variety of angles—overhead, eye-level, and close-up shots—to showcase different perspectives of your model. Adjust the camera settings, like ISO, aperture, and shutter speed, for optimal exposure.
Incorporating Scale Elements
Adding scale elements provides a sense of proportion and context. Use miniature figures, vehicles, or trees to represent the real-world environment. These elements make it easier to understand the model’s dimensions and spatial relationships. Ensure that scale elements are proportionate to the model to avoid misleading perceptions.
Enhancing with Textures and Finishes
Textures and finishes contribute to the model’s authenticity. Use materials like corrugated paper for roofs or printed bitmaps for tiles and bricks. Stick these accurately to surfaces for a neat finish. Experiment with different materials to find the best representation for your architectural features. Use masking tape or double-sided tape carefully to prevent tearing the paper or foam board surfaces.
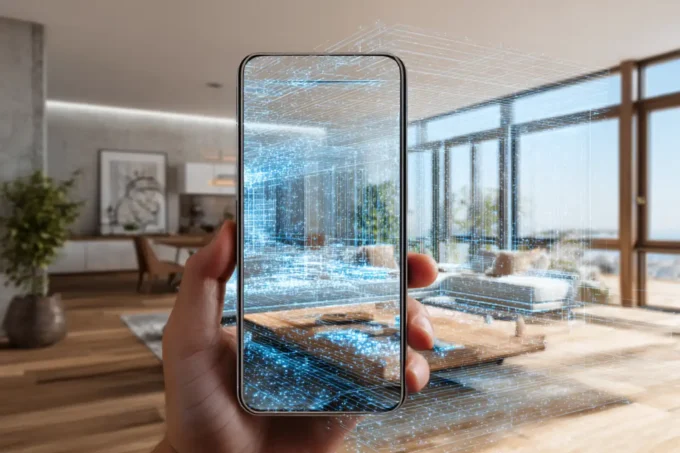
Utilizing Digital Enhancements
Combine physical models with digital enhancements to create a comprehensive presentation. Use laser cutting for precision details, ensuring the virtual model is set up correctly to transfer to the physical model. Consider 3D printing for producing organic shapes that are difficult to achieve manually. Digital tools enhance the accuracy and efficiency of the model-making process.
By following these strategies, you can present architectural models that are not only visually appealing but also informative and impactful in showcasing designs.

Common Challenges in Model Making
Overcoming Material Limitations
When working with different materials, we often encounter constraints that impact our design. For instance, foam core and balsa wood are lightweight but may not be durable for intricate details. Cardstock is easy to cut but can warp when exposed to glue.
- Choosing the Right Material: Each material brings unique qualities. Foam core is ideal for structures, while balsa wood is perfect for fine details. Cardstock works well for walls and floors.
- Preventing Warping: We can avoid warping by using less water-based glue. For instance, spray adhesive provides a balance and minimizes moisture exposure.
- Combining Materials: Using a combination optimally addresses limitations. Glue heavy-weight cardstock onto foam core, adding durability without sacrificing ease of cutting.
Solutions for Structural Issues
Structural stability can be a challenge, especially in larger models. Weak joints or imprecise cuts can cause parts to misalign or collapse.
- Strengthening Joints: To enhance joint strength, we can use tacky glue or white glue, known for their strong bonds. For quicker fixes, double-sided tape or masking tape can hold pieces in place while the glue dries.
- Precision Cutting Tools: Metal rulers and self-healing cutting mats ensure precision and reduce errors. Metal rulers are available in various lengths, suiting different model scales.
- Supporting Larger Structures: For large models, integrating internal supports or using thicker base materials can improve stability. This approach prevents sagging and maintains integrity over time.
By addressing these common challenges, we enhance the quality and durability of our architectural models, making them more effective tools for design analysis and client presentations.
How Physical Models Shape the Design Process
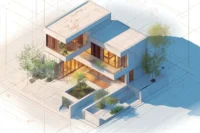
A model is more than a presentation object; it is a thinking tool. Working at scale lets architects test proportion, light, circulation and the relationship between spaces in ways drawings alone cannot reveal, often exposing problems and opportunities early in the process. Many studios move fluidly between quick study models that explore ideas and refined final models that communicate a resolved design to clients, and increasingly pair both with digital models so the physical and virtual versions inform each other.
Conclusion
We’ve uncovered several key tips to enhance the architectural model-making process. To achieve precision in cuts, metal rulers and self-healing cutting mats are indispensable. For strong, durable joints, understanding different glue types is crucial. Hot glue offers quick drying times, while white, tacky, and double-sided tape provide cleaner results for various materials.
Material selection impacts model stability and appearance. Choosing the right thickness and type, especially for laser cutting, ensures accuracy and avoids potential issues like burnt edges on wood. For organic shapes, 3D printing is more suitable.
Scale accuracy remains vital. Calculating how many millimeters represent one meter at a specific scale helps maintain proportion. Using masking tape strategically, such as stabilizing rulers, also contributes to precision.
Addressing common challenges involves strategic material combination and reinforcement of joints. Using precision cutting tools and supporting larger structures properly can elevate the overall quality of the model.
By integrating these tips, we can create architectural models that not only meet design and presentation needs but also withstand practical challenges.
- advanced model making techniques
- architectural design models guide
- architectural miniature models
- architectural model craftsmanship
- Architectural Model Making
- architectural model making tutorial
- architectural model sculpture tips
- architectural modeling techniques
- best practices for architectural model making
- crafting architectural model details
- craftsmanship in architectural models
- creating architectural models
- essential tools for model making
- guide to architectural model making
- high precision model making
- making precise scale models
- model building precision tips
- model making tips
- precision in model making
- scale model making guide
- scale model making precision
- step-by-step model making guide


Leave a comment