

Table of Contents Show
SketchUp architecture models become presentation-ready when paired with Lumion’s real-time rendering engine. This guide walks through every stage of the pipeline, from organizing your SketchUp file and assigning materials to exporting into Lumion, building scenes, and producing photorealistic images and animations.
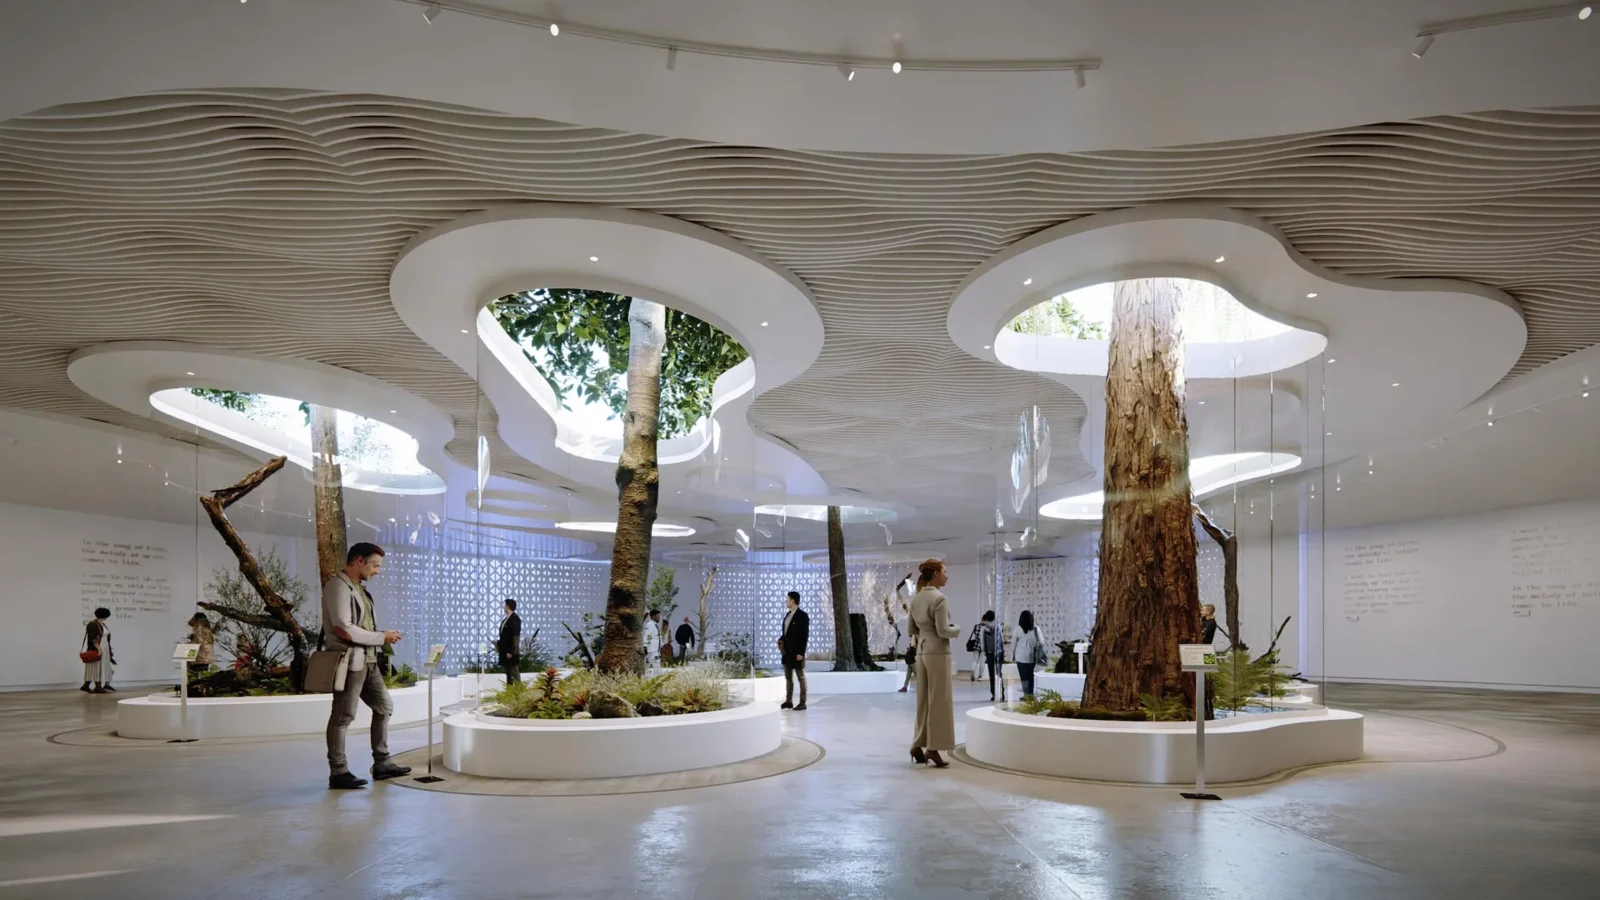
Architects who model in SketchUp often hit a wall when it comes to visualization. The built-in styles are great for diagrammatic views, but clients expect rendered visuals with realistic lighting, vegetation, and materiality. That is exactly where Lumion fits in. It reads SketchUp files natively, renders in real time, and produces output that ranges from quick concept shots to polished marketing imagery. The workflow between the two programs is one of the most popular pipelines in architectural practice today, and for good reason: it is fast, forgiving, and does not require a rendering background to get started.
Why SketchUp and Lumion Work So Well Together
SketchUp for architecture has always been about speed. You can push and pull geometry into recognizable building forms within minutes, which makes it ideal for early design phases and client conversations. Lumion picks up where SketchUp’s visual capabilities end. It accepts .skp files directly, preserving layers, groups, and component structure, so there is very little cleanup between modeling and rendering.
The combination works because SketchUp handles spatial thinking while Lumion handles visual storytelling. You do not need to rebuild geometry or convert file formats. A residential project modeled in SketchUp can be inside Lumion with full materials, landscaping, and atmospheric effects in under an hour. That speed matters when deadlines are tight and design changes arrive daily.
💡 Pro Tip
Name every layer (tag) and group in your SketchUp file before sending it to Lumion. Lumion imports SketchUp’s layer structure as toggleable categories, so a well-organized model lets you hide interior walls for section cuts or isolate landscape elements without going back to SketchUp.
Preparing Your SketchUp Architecture Model for Lumion
A clean SketchUp file is the single biggest factor in a smooth Lumion experience. Messy geometry, ungrouped faces, and oversized textures create problems that show up as flickering surfaces, missing faces, or slow import times in Lumion.
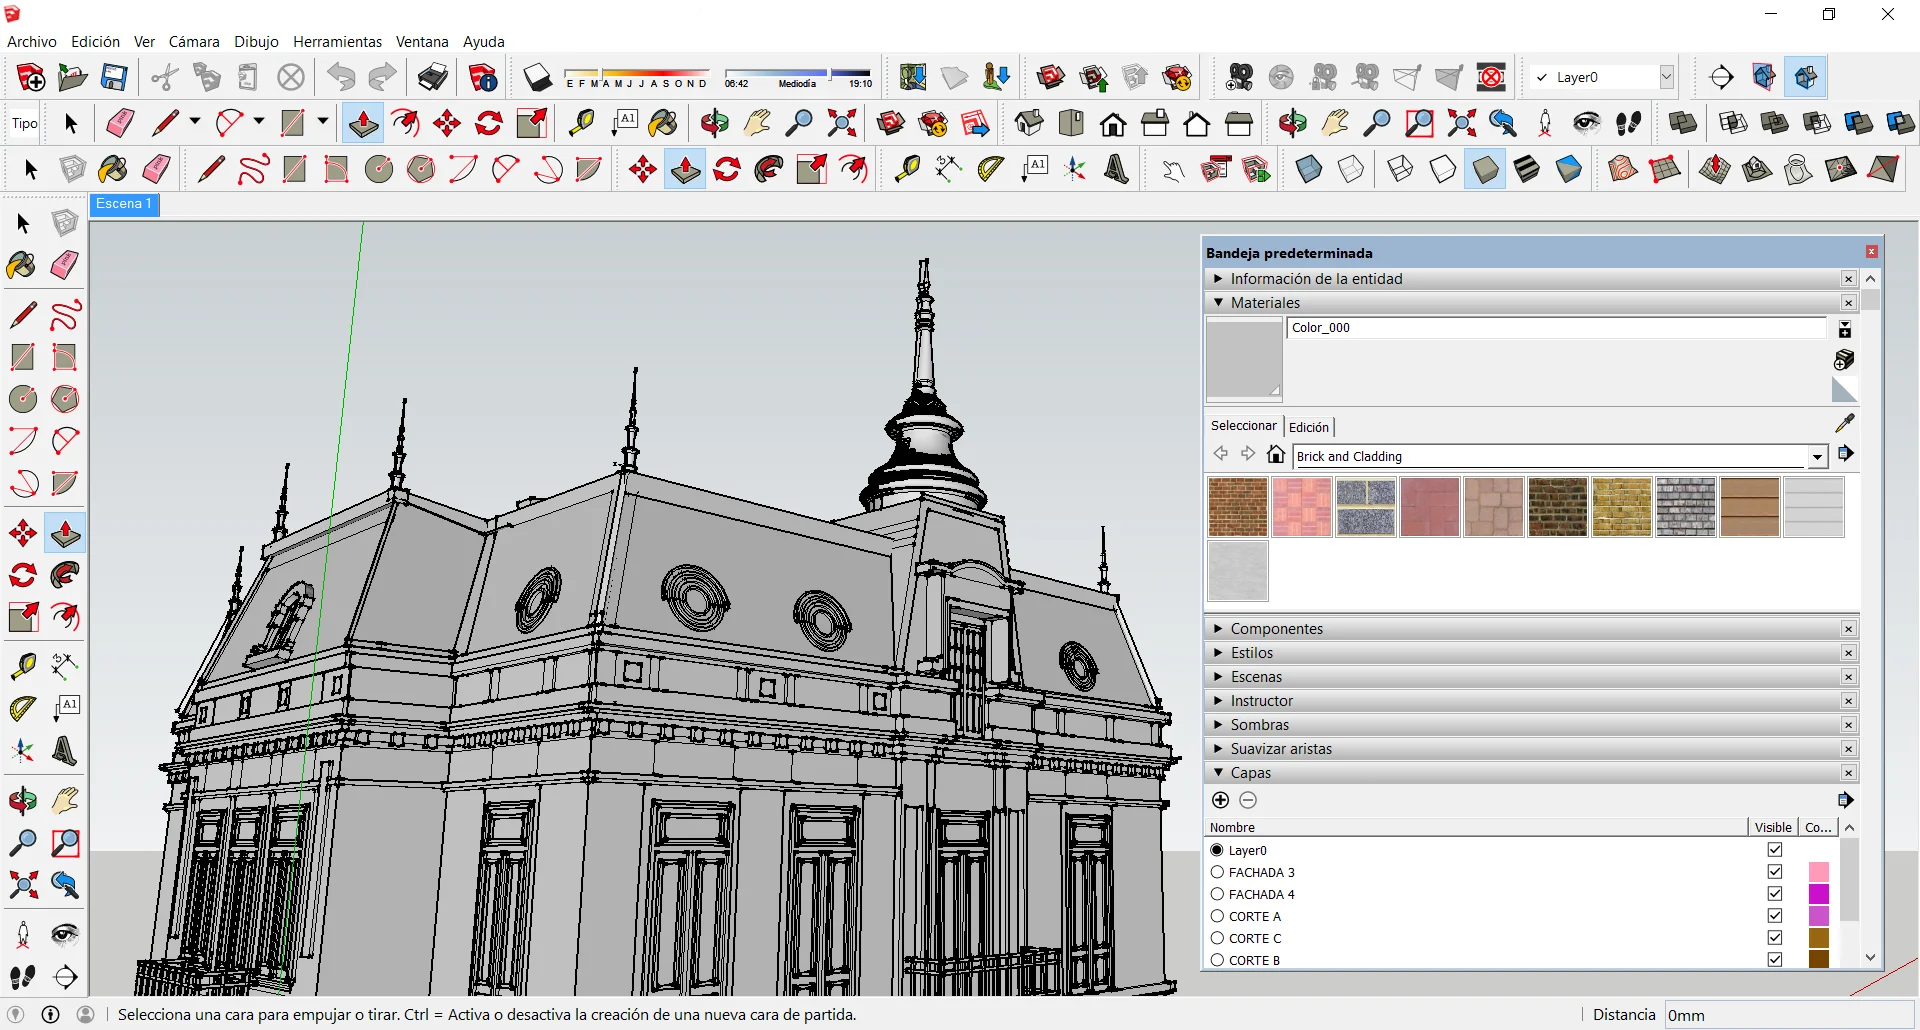
Start by auditing your model. Use SketchUp’s “Purge Unused” command (Window > Model Info > Statistics > Purge Unused) to strip out materials, components, and layers you are no longer using. Large models with hundreds of unused components can double in file size, slowing both SketchUp and Lumion.
Group everything logically. Walls, floors, roofs, furniture, and site elements should each sit in their own groups or components and be assigned to clearly named tags. This structure carries over into Lumion and gives you per-element control over visibility, materials, and placement.
Face orientation matters more than most users realize. SketchUp geometry has front faces (white by default) and back faces (blue-gray). Lumion only renders front faces. If you see missing walls or invisible floors in Lumion, the cause is almost always reversed face normals in SketchUp. Right-click the affected face and choose “Reverse Faces” before exporting.
Managing Materials in SketchUp Before Export
You have two strategies for materials. The first is to apply basic SketchUp materials as color placeholders and then replace them in Lumion with high-quality PBR materials from Lumion’s library. This is the faster approach for most projects because Lumion’s material library includes thousands of ready-made options with bump maps, reflections, and weathering already configured.
The second strategy is to apply final materials directly in SketchUp using custom textures. This works well when you need specific proprietary finishes (a particular stone, a branded tile pattern) that Lumion’s library does not include. If you go this route, keep texture files under 2048 x 2048 pixels to prevent slow imports.
⚠️ Common Mistake to Avoid
Applying materials to individual faces instead of groups is one of the most common SketchUp errors that causes headaches in Lumion. When you paint a group’s container, every face inside inherits that material and can be swapped as a single unit in Lumion. When you paint individual faces, each one becomes a separate material entry, making bulk changes extremely tedious.
How to Export SketchUp to Lumion
There are two main paths for getting your SketchUp model into Lumion: manual import and LiveSync. Each has distinct advantages depending on where you are in the design process.
Manual Import (.skp File)
The simplest method is to save your SketchUp file and import it directly into Lumion. In Lumion, go to the Objects menu, click the import icon, and browse to your .skp file. Lumion reads SketchUp files natively up to SketchUp 2025 format, so no intermediate file conversion is needed.
During import, Lumion will ask you to place the model in the scene. Position it at the origin point for consistency, especially if you plan to re-import updated versions later. Lumion also offers a “Reload” function that re-reads the .skp file and updates geometry changes without losing materials, objects, or effects you have already applied in Lumion. This reload workflow is the backbone of an iterative design process between the two programs.
LiveSync: Real-Time Connection
Lumion’s LiveSync plugin for SketchUp creates a live link between the two applications. Every change you make in SketchUp appears in Lumion within seconds. Camera positions sync as well, so you can orbit your model in SketchUp and see the rendered view update simultaneously in Lumion.
LiveSync is best suited for the design development phase, when you are still adjusting massing, testing facade proportions, or comparing material options. It requires both programs to be open at the same time, so you will need a workstation with at least 16 GB of RAM and a dedicated GPU (NVIDIA GTX 1660 or higher is the recommended minimum for comfortable performance).
To set it up, install the LiveSync extension from the SketchUp Extension Warehouse, open both programs, and click the LiveSync button in SketchUp’s toolbar. Lumion will automatically import the model and begin syncing.
📐 Technical Note
LiveSync for SketchUp V3.60.786 supports SketchUp versions 2020 through 2025 and requires Lumion 10.3 or newer. The newer Lumion View plugin (version 4.0+) adds real-time rendering directly inside SketchUp and is officially supported for SketchUp 2025.0 or newer with Lumion 2024 and above.
Setting Up Your Scene in Lumion
Once your SketchUp architecture model is inside Lumion, the next step is building the environment around it. This is where Lumion’s strength really shows: it ships with a library of over 6,000 objects and 1,250 materials that you can drag and drop directly into your scene.
Start with the ground plane. Choose a landscape style (flat, hilly, coastal) and refine it with Lumion’s terrain sculpting tools. Then add context: trees, vehicles, people, street furniture. Place these elements to support the architectural narrative rather than filling every open space. A few well-placed trees casting shadows onto a facade tell a stronger story than a hundred scattered across the site.
For materials, open the material editor by clicking on any surface in Lumion. You can replace SketchUp materials one by one or use the “Select All” option to swap every instance of a material at once. Lumion’s PBR materials include adjustable properties like roughness, bump intensity, and color tint, so you can fine-tune each surface without leaving the program. If you applied materials at the group level in SketchUp, this process goes much faster because each group maps to a single material slot.
Lighting and Atmosphere
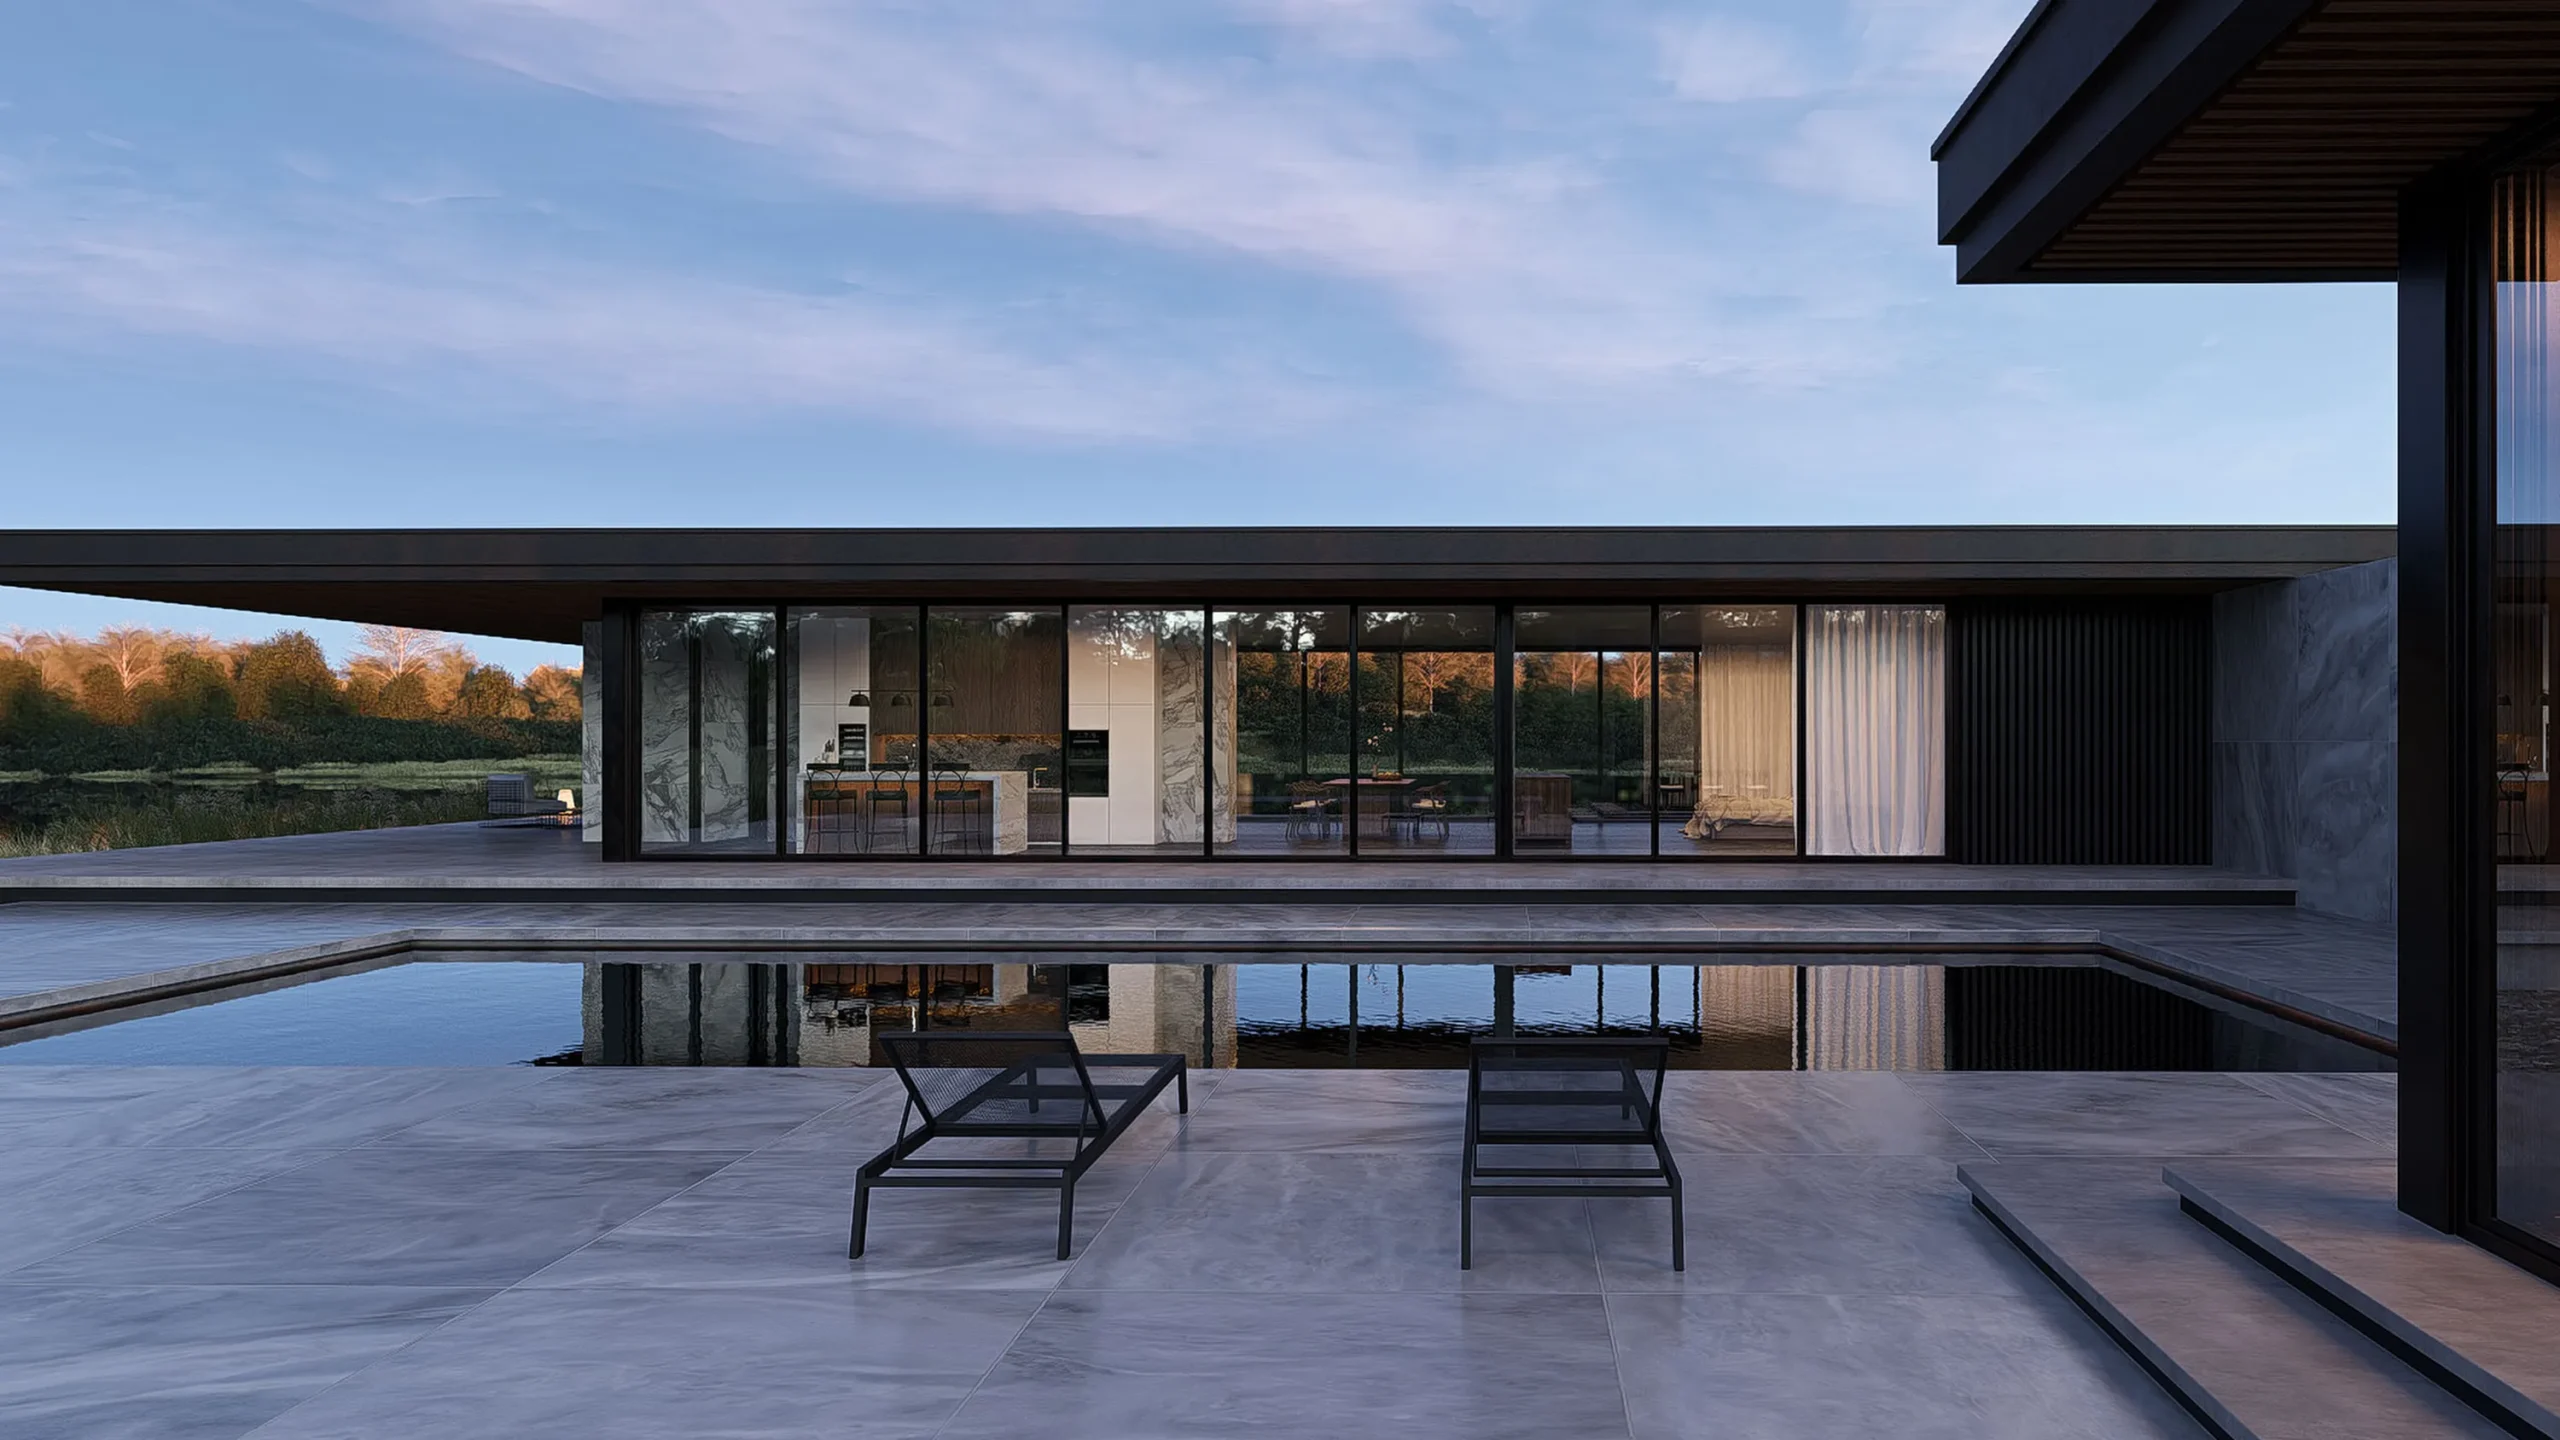
Lumion handles lighting through a combination of sun position, sky presets, and artificial light objects. For exterior shots, adjust the sun’s azimuth and altitude to get the shadow angle you want. Golden hour settings (sun low on the horizon, warm color temperature) produce the most dramatic results and are a staple of architectural visualization.
For interior scenes, place Lumion’s area lights, spotlights, or omni lights where your actual fixtures would go. The real-time feedback means you can see exactly how light falls across surfaces as you adjust intensity and color. Add volumetric light effects sparingly for atmosphere, like sunbeams through a skylight, but avoid overusing them because they can make images look artificial.
🎓 Expert Insight
“The biggest mistake I see architects make with rendering software is spending too much time on geometry detail and not enough on lighting. Lighting is 80% of a good render.” — Licensed visualization specialist with 12+ years in architectural rendering
This observation holds especially true in Lumion, where the effects stack gives you precise control over sun position, shadow softness, and exposure. Spending an extra 15 minutes on lighting setup often produces better results than hours of additional modeling.
Rendering and Output Settings
Lumion offers two main output modes: Photo and Video. Both use the same effects stack, but Video mode adds timeline-based camera animation and transitions.
For still images, set up your camera angle in Lumion’s Photo mode, then build an effects stack. A typical stack for an exterior architectural shot includes: two-point perspective correction, sun study (to lock your lighting), color correction, sharpness, and optionally depth of field. Render at 4K (3840 x 2160) or higher for print-quality output. Lumion 2024 renders images up to five times faster than earlier versions thanks to optimized ray tracing, so high-resolution output no longer means long wait times.
For animations, switch to Movie mode and set keyframes along a camera path. Keep camera movements slow and deliberate. A 30-second flyaround at 30 fps gives you 900 frames, which is enough to show a full exterior orbit of a mid-scale building. Export as MP4 for quick sharing or as an image sequence for post-production compositing in software like Adobe Premiere or DaVinci Resolve.
Video: SketchUp Lumion Workflow
This tutorial by Alphonso Peluso walks through the full pipeline from importing an AutoCAD drawing into SketchUp, building a 3D model, and then bringing it into Lumion for materials, lighting, and effects.
Workflow Comparison: Manual Import vs. LiveSync
The table below compares the two primary methods for connecting SketchUp to Lumion, so you can choose the right approach based on your project stage.
Manual Import vs. LiveSync at a Glance
| Feature | Manual Import (.skp) | LiveSync Plugin |
|---|---|---|
| Setup Required | None, native .skp support | LiveSync extension install |
| Update Method | Save file, click Reload in Lumion | Automatic, changes sync in seconds |
| Camera Sync | No | Yes, bi-directional |
| RAM Requirement | Standard (8 GB minimum) | Higher (16 GB+ recommended) |
| Best For | Final rendering, large models | Design development, quick iterations |
| Preserves Lumion Scene | Yes, via Reload function | Yes, materials and objects persist |
💡 Pro Tip
Use LiveSync during design development for real-time feedback, then switch to manual import for final rendering. LiveSync keeps both programs running simultaneously, which can strain your GPU on complex models. Closing SketchUp before your final render frees up VRAM and can noticeably reduce render times.
Common Issues When Exporting SketchUp to Lumion
Even with a clean model, a few problems come up regularly. Missing faces are the most frequent issue, caused by reversed normals in SketchUp. The fix is straightforward: select all geometry in SketchUp (Ctrl+A), right-click, and choose “Orient Faces.” This corrects the majority of reversed surfaces in one step.
Flickering surfaces (known as z-fighting) happen when two faces occupy the exact same plane. This is common at wall-to-floor junctions where geometry overlaps. The solution is to offset one surface by even 1 mm in SketchUp to eliminate the overlap.
Slow import times usually stem from excessive polygon counts. SketchUp models with millions of edges (often caused by highly detailed 3D Warehouse components like trees or furniture) can take several minutes to import. Replace heavy components with simpler placeholders in SketchUp and use Lumion’s own 3D library for vegetation, people, and vehicles instead.
Material mismatches occur when SketchUp texture file paths break (for example, if you move the .skp file to a different folder without its textures). Before exporting, go to File > Save As and check “Save referenced texture files” to embed all textures in the .skp file itself.
Tips for Better SketchUp to Lumion Results
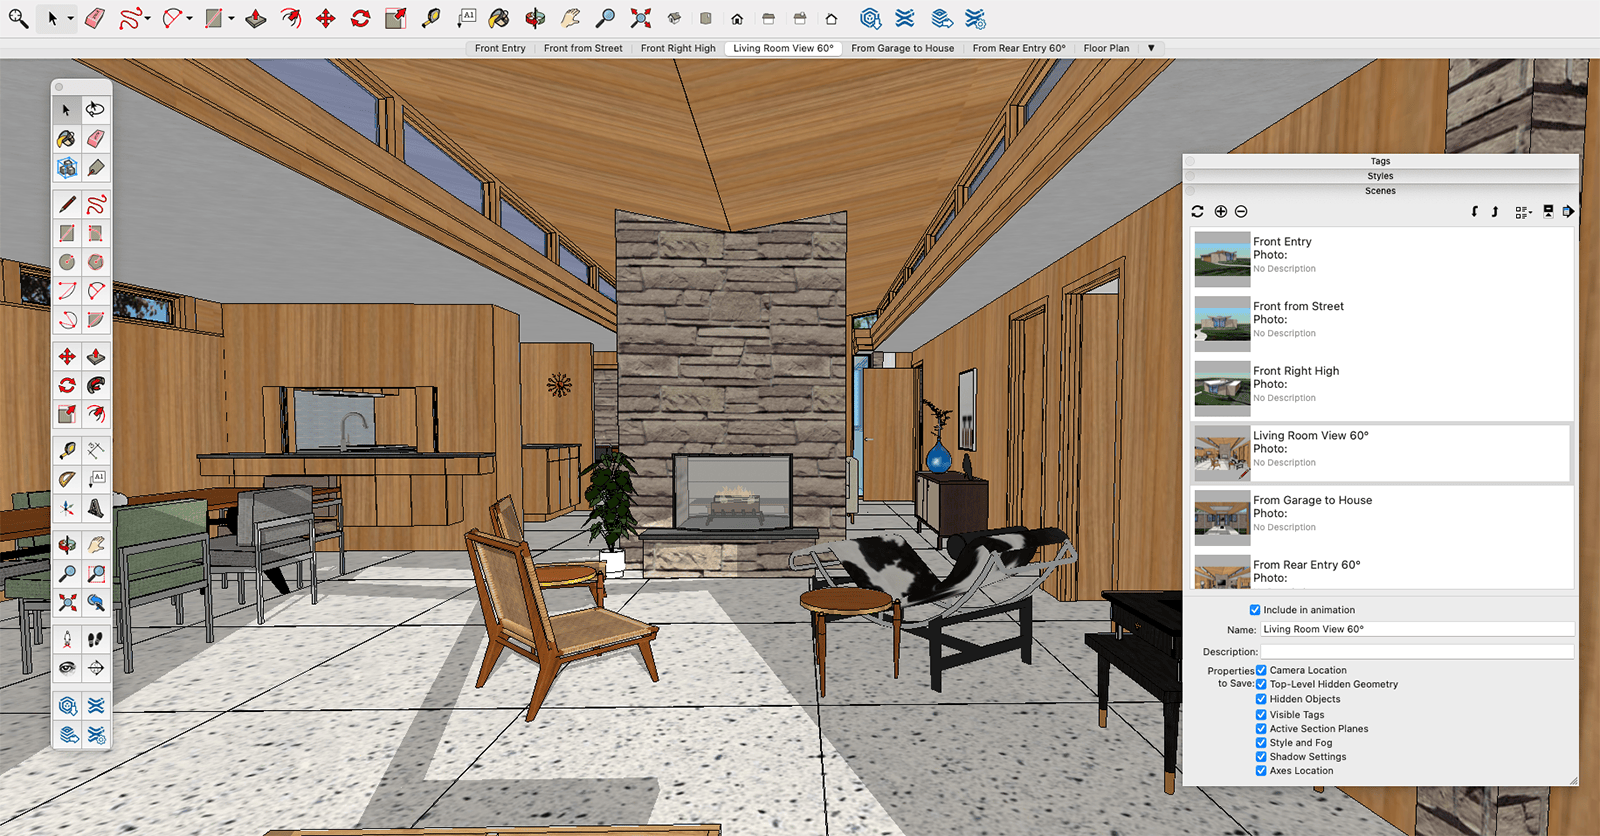
A few habits will dramatically improve your output quality. First, model at real-world scale. SketchUp defaults to meters, and Lumion expects 1:1 scale. If your model is scaled incorrectly, trees will tower over buildings or people will appear as ants.
Second, use SketchUp’s scenes feature to save camera angles. When you import into Lumion, you can quickly set up matching viewpoints for your renders rather than hunting for the right perspective manually.
Third, keep your Lumion effects stack consistent across all images in a project. Save an effects template after configuring your first shot, then apply it to every subsequent camera angle. This ensures color grading, sharpness, and exposure remain uniform across your presentation set, which is critical for professional submissions.
Finally, render at least one nighttime view. Night renders with warm interior lighting and cool exterior tones are visually striking and require very little extra work in Lumion. Swap the sky preset, turn on your interior lights, and adjust exposure. The result often becomes the hero image of a presentation.
✅ Key Takeaways
- SketchUp architecture models import directly into Lumion as .skp files with no format conversion required.
- Clean SketchUp files with proper grouping, named tags, and correct face orientation prevent the most common Lumion import problems.
- LiveSync provides real-time feedback during design development, while manual import is better suited for final rendering sessions.
- Spending time on lighting setup and effects consistency produces better results than adding excessive geometric detail.
- Applying materials at the group level in SketchUp gives you single-click material swapping in Lumion, saving significant time.
Final Thoughts
The SketchUp to Lumion workflow is one of the most accessible rendering pipelines available to architects. It does not require scripting knowledge, specialized hardware beyond a decent GPU, or months of training. The core loop is simple: model in SketchUp, import into Lumion, add context and lighting, render. What separates good results from great ones is attention to the details covered above, especially file organization, face orientation, material management, and lighting. Build those habits early, and your rendering output will improve with every project.
Software versions and system requirements may vary. Always check the official Lumion and SketchUp documentation for the latest compatibility information before starting a new project.
Frequently Asked Questions
Can I use SketchUp Free (web version) with Lumion?
No. Lumion requires a .skp file saved from the desktop version of SketchUp. The free web version of SketchUp does not allow local .skp exports in a format Lumion can read. You need at least SketchUp Go or SketchUp Pro for full Lumion compatibility.
How do I export from SketchUp to Lumion without losing materials?
Save your SketchUp file normally as an .skp file. Lumion reads SketchUp materials automatically. To prevent broken texture links, use “Save As” and make sure referenced texture files are embedded. In Lumion, you can then refine or replace these materials using the built-in library.
Does Lumion support SketchUp layers and tags?
Yes. Lumion imports SketchUp tags (formerly called layers) and lets you toggle their visibility within the Lumion scene. This is useful for hiding interior elements in exterior renders or isolating specific building systems for diagram-style outputs.
What is the best file size for a SketchUp model going into Lumion?
Aim to keep your .skp file under 100 MB for smooth performance. Files above 200 MB will still import, but expect longer load times and potential lag during scene editing. Use SketchUp’s Purge Unused function and replace heavy 3D Warehouse components with Lumion library objects to keep file sizes manageable.
Can I update my SketchUp model in Lumion without losing my scene setup?
Yes. Lumion’s “Reload” function re-imports the updated .skp file while preserving all Lumion-side changes, including materials, placed objects, lighting, and camera angles. This makes iterative design changes straightforward without rebuilding your scene from scratch.


Leave a comment