

Table of Contents Show
Rhino and Grasshopper for architects is the combination of Rhinoceros 3D, a NURBS-based modeling program, with Grasshopper, its built-in visual scripting editor. Together they allow you to build precise free-form geometry, automate repetitive modeling tasks, and test parametric design variations in real time without writing a single line of code.
If you have ever watched a colleague drag a slider and watched an entire facade update on screen, you were looking at a Grasshopper definition running inside Rhino. The pair has become a standard toolkit in firms that work with complex geometry, environmental analysis, or digital fabrication. This article covers what the two programs actually do, how they fit into an architectural workflow, which plugins matter most, and where to start learning.

What Are Rhino and Grasshopper?
Rhinoceros 3D (usually called Rhino) is a 3D modeling application developed by Robert McNeel & Associates. Its geometry engine is built on NURBS (Non-Uniform Rational B-Splines), a mathematical method for describing smooth curves and surfaces with high precision. That makes Rhino especially strong for double-curved facades, organic roof shells, and any shape that does not reduce to simple boxes. Architects also rely on it for accurate 2D drafting, section cuts, and file exchange because it reads and writes nearly every major CAD format.
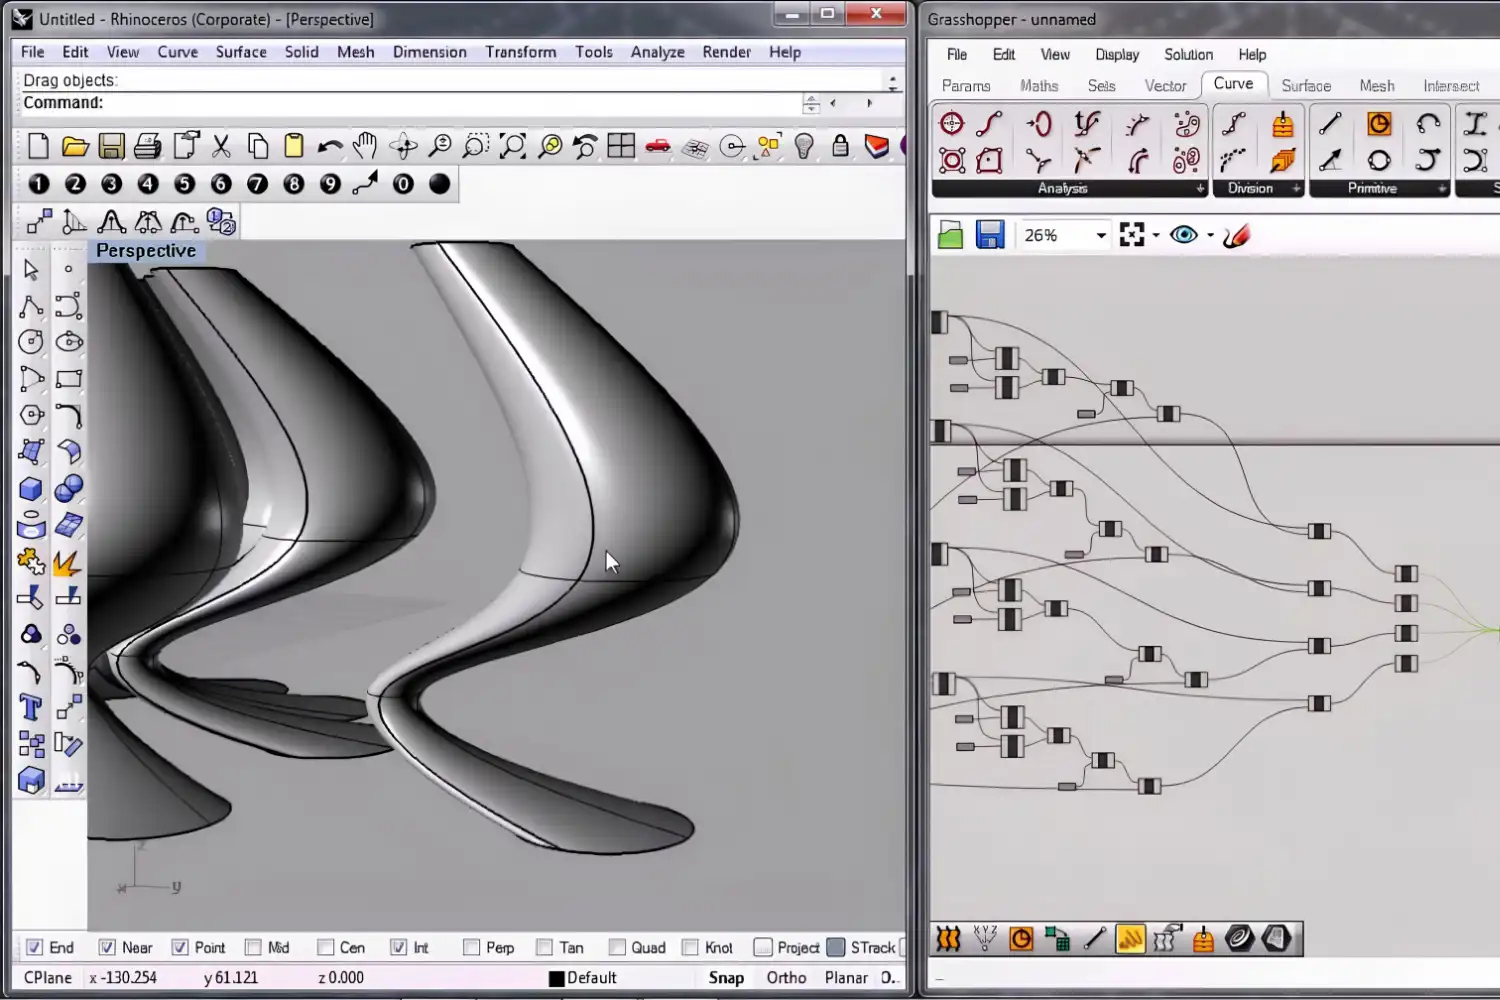
Grasshopper is a visual programming environment that runs as a tab inside Rhino. Rather than typing code, you place components on a canvas and connect them with wires. Each component performs a specific operation: create a point, move a curve, divide a surface, evaluate sunlight. When you change an input, every downstream component recalculates automatically. Grasshopper has shipped with Rhino since version 6, so there is nothing extra to install.
The two programs are not competitors. Rhino handles direct modeling, dimensioning, and output. Grasshopper handles logic, rules, and data flow. Most architects switch between them constantly during a project, modeling fixed elements like site boundaries directly in Rhino while using Grasshopper to generate and iterate on variable elements such as a panel layout or structural grid. For a deeper look at the philosophy behind this kind of rule-based design, see the introduction to parametric architecture on this site.
💡 Pro Tip
When you start a new design study, model the fixed constraints (site boundary, structural grid, code-mandated envelope) directly in Rhino first, then reference those objects into Grasshopper as inputs. This keeps your definition clean and avoids rebuilding geometry that will never change.
How Grasshopper Parametric Modeling Works in Practice
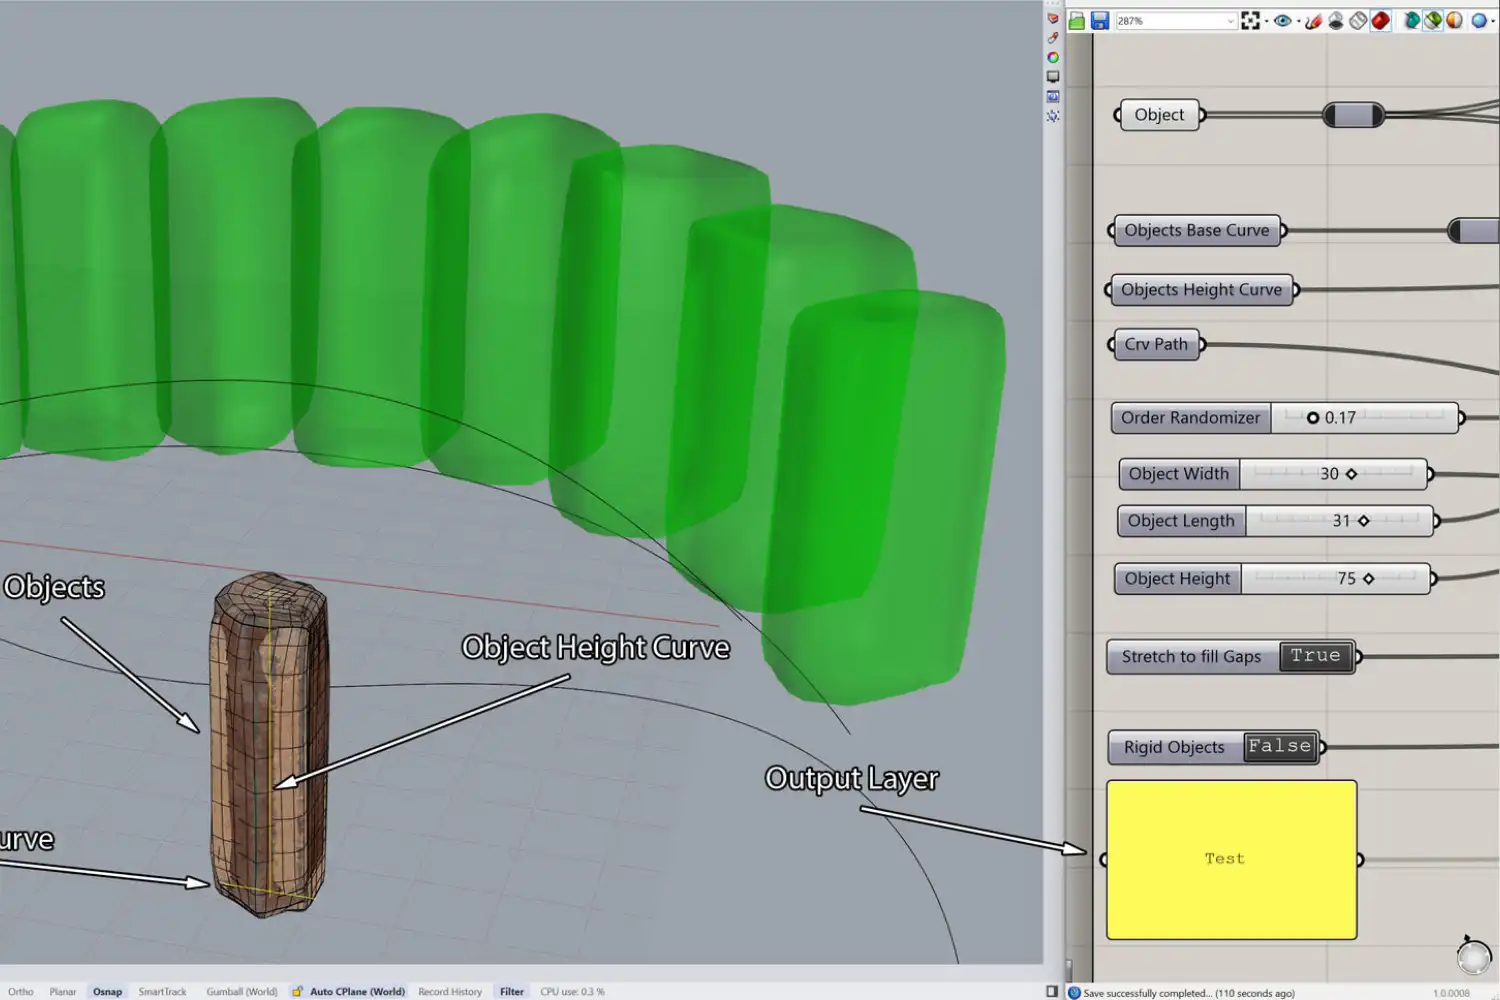
A Grasshopper file is called a “definition.” Think of it as a recipe: raw ingredients go in on one side, a finished dish comes out the other. The ingredients are parameters such as a number slider set to a panel width, a curve pulled from Rhino, or a CSV file of solar radiation data. The recipe steps are components that transform those inputs, for example, dividing a surface into a grid, offsetting each cell, and applying an attractor point that scales the cells based on distance.
This structure means you can change the panel width slider from 600 mm to 900 mm, and every panel, every connection detail, and every material schedule linked to that slider updates instantly. That speed of iteration is why grasshopper parametric modeling has become central to firms working on facade design, landscape architecture, and structural optimization.
A typical early project in Grasshopper for Rhino might look like this: you draw a base surface in Rhino representing a wall. In Grasshopper, you divide that surface into a UV grid, rotate each panel cell by an angle driven by its distance from a point, and then bake the result back into Rhino as actual geometry you can dimension and export. The entire operation takes minutes to set up, and afterward any change to the base surface or the rotation rule propagates through the definition.
Grasshopper also handles data in lists and trees, which is how it manages hundreds or thousands of geometry pieces at once. Understanding data trees is the single biggest learning curve for new users, but once you grasp how branches and paths work, definitions that seemed confusing start to make sense. If you want to understand why this skill set matters for your career, the article on why architects need computational design skills is worth reading.
⚠️ Common Mistake to Avoid
New users often try to build everything inside Grasshopper, including fixed geometry that never changes. This makes definitions slow and difficult to read. Keep static elements in Rhino and reference them into Grasshopper with a “Referenced Geometry” component. Your definitions will run faster and be easier for collaborators to follow.
Essential Grasshopper Plugins for Architects
One reason Rhino Grasshopper has grown so popular in architecture is the plugin ecosystem. The Food4Rhino marketplace hosts thousands of add-ons, but a handful have become near-essential for architectural work. Since Rhino 8, many of these can be installed directly through the Package Manager inside the application.
Key Plugins at a Glance
The table below summarizes the grasshopper plugins for architects that appear most often in professional workflows:
| Plugin | Primary Use | Cost |
|---|---|---|
| Ladybug Tools | Sun path, radiation, wind, and energy analysis | Free / open-source |
| Karamba3D | Structural analysis and form-finding | Paid (free limited version) |
| LunchBox | Paneling patterns, data management, geometry tools | Free |
| Kangaroo Physics | Physics-based form-finding and simulation | Free (ships with GH) |
| PanelingTools | Facade paneling and rationalization | Free with Rhino |
| Elefront | Baking with attributes, layers, and user data | Free |
Ladybug Tools deserves special mention. It connects Grasshopper to climate data files (EPW) and simulation engines like EnergyPlus and Radiance, letting you run daylight, radiation, and thermal comfort studies without leaving Rhino. For landscape architects, grasshopper parametric modeling for landscape architects often starts with Ladybug because site-level solar and wind analysis directly informs planting, grading, and microclimate decisions.
Kangaroo Physics, developed by Daniel Piker at McNeel, is already bundled with Grasshopper. It handles real-time physics simulation, making it the go-to tool for tensile membrane form-finding, shell optimization, and origami-style folding studies. If your project involves any kind of minimal surface or tension structure, Kangaroo is where you will spend time. For a broader comparison of design software options, see the parametric design tools guide.
📌 Did You Know?
Food4Rhino currently lists over 3,000 plugins and add-ons for Rhino and Grasshopper. The majority of them are free and open-source, maintained by a community of architects, engineers, and researchers around the world.
Rhino Grasshopper Tutorials and Learning Path
The learning curve for Rhino on its own is moderate. Most architects pick up basic modeling within a few weeks. Grasshopper adds another layer because it requires you to think procedurally: instead of drawing a shape, you describe the rules that generate it. That shift in thinking takes practice, but the payoff is large.
A practical learning path looks like this. First, get comfortable modeling in Rhino, especially with surfaces, polysurfaces, and the Gumball tool. Second, open Grasshopper and work through the official Grasshopper Primer by Mode Lab, which is free and covers every core concept from sliders to data trees. Third, pick a small real project, maybe a facade study or a staircase, and build it as a Grasshopper definition. Applying concepts to actual design problems is the fastest way to internalize them.
For rhino grasshopper tutorials for architects specifically, the Grasshopper community forum remains one of the best free resources. Users post definitions, ask questions, and share workflows daily. Structured courses are available on platforms like Coursera, Udemy, and ThinkParametric for those who prefer guided instruction. If you want to see how computational skills fit into the broader picture of an architecture career, the article on how computational design is changing architecture puts the tools in context.
💡 Pro Tip
Start every Grasshopper definition with a “Scribble” component that notes what the definition does, what inputs it expects, and the date. Three months later, when you reopen the file for a different project, you will thank yourself for the documentation.
Where to Go From Here
Your Next Step: Download the free Rhino evaluation from rhino3d.com, open Grasshopper from the command line, and build one simple definition: a surface divided into panels scaled by an attractor point. That single exercise covers reference geometry, surface division, data trees, and baking, which are the four concepts everything else builds on.


Leave a comment