

Table of Contents Show
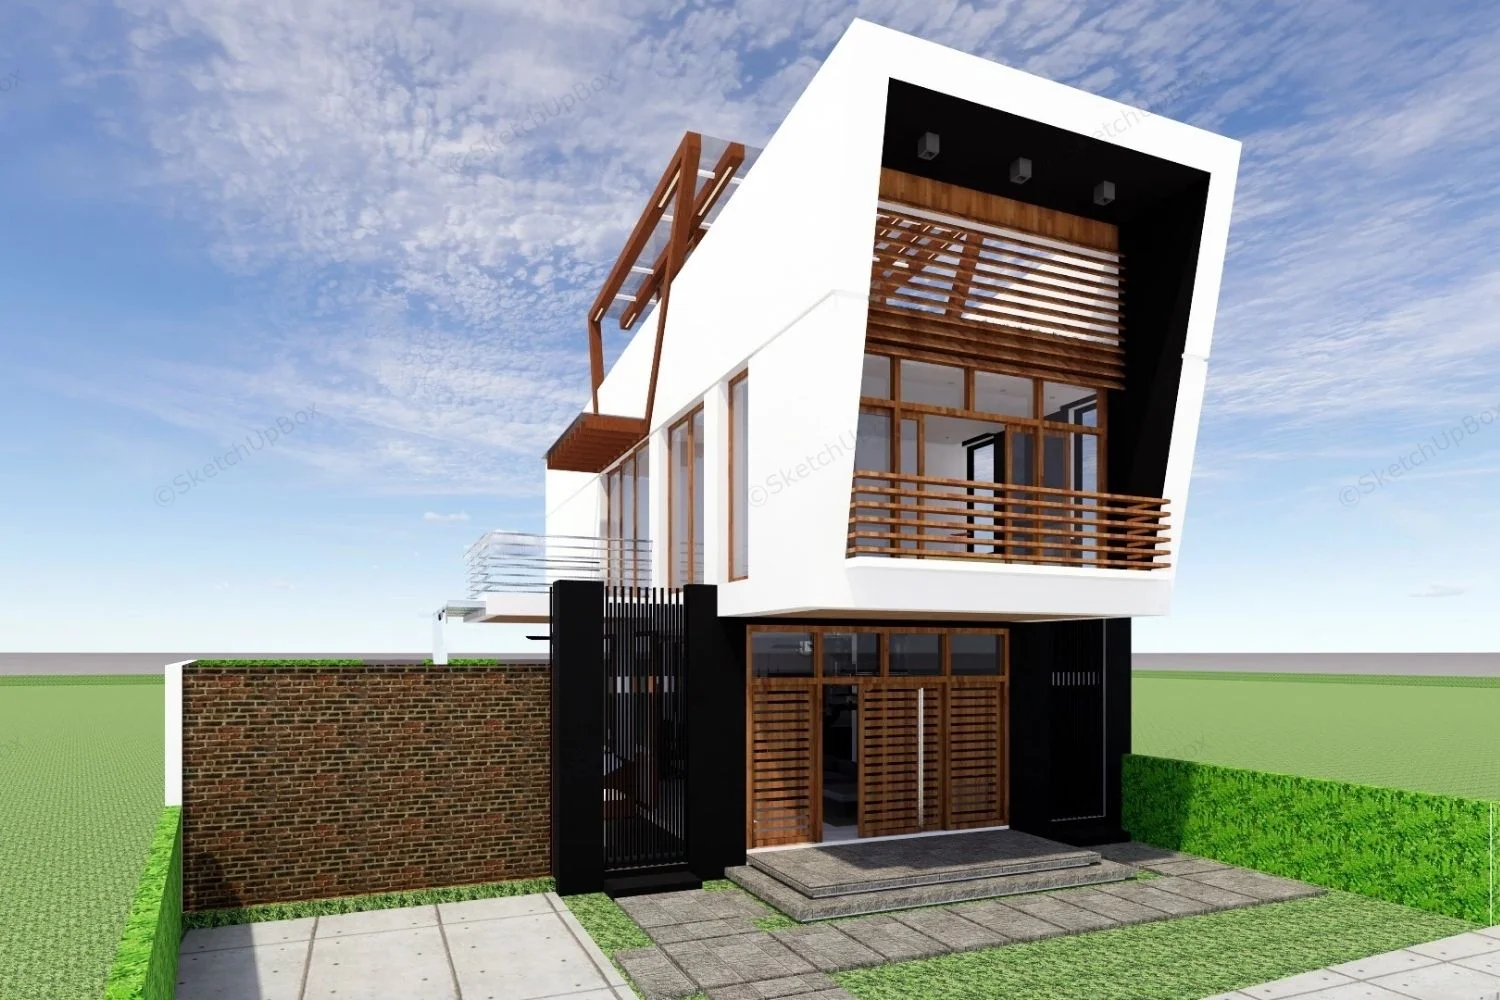
SketchUp for architecture is one of the fastest 3D modeling tools to pick up, and with a focused 30-day plan you can go from zero experience to producing presentation-ready building models. This guide breaks the learning curve into four weekly blocks, each building on the last, so you develop real skills instead of watching tutorials passively.
If you are an architecture student starting your first design studio, a professional switching from another platform, or someone returning to practice after a break, this structured approach will get you modeling real buildings within a month. The plan covers core tools, architectural workflows that set SketchUp apart from BIM tools like ArchiCAD, essential plugins, and the LayOut documentation pipeline that makes SketchUp viable for professional output.
Why SketchUp Works for Architecture

SketchUp’s push-pull modeling logic mirrors how architects think about space. You draw a shape, push it into three dimensions, and immediately see a building form. This direct manipulation approach means you spend less time learning software commands and more time testing design ideas. For concept design and early-stage massing studies, few tools match SketchUp’s speed.
The software runs a freemium model. SketchUp Free (browser-based) handles basic modeling. SketchUp Pro adds the desktop application, LayOut for 2D documentation, and advanced importers/exporters. SketchUp Studio, the top tier, includes V-Ray rendering and Revit file import. For architecture students, Trimble offers educational licenses at reduced cost through university programs.
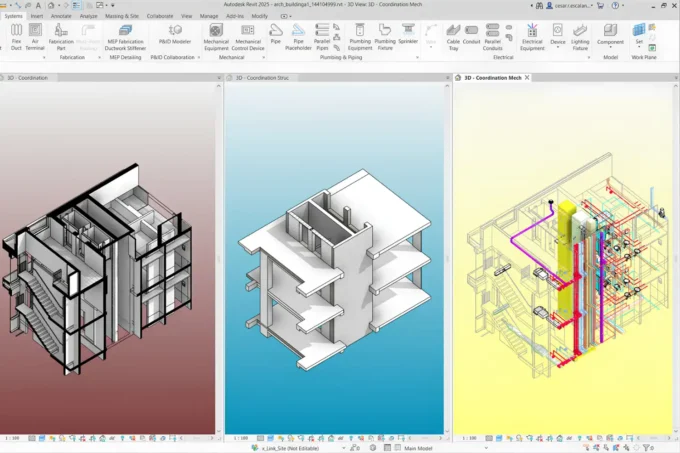
Compared to Revit or ArchiCAD, SketchUp is not a BIM platform. It does not carry embedded data about wall assemblies, schedules, or MEP coordination. But that is precisely why many architects keep it in their toolkit: it stays out of the way during the creative phase. Once a design matures, you can export to BIM software or use plugins that bridge the gap.
💡 Pro Tip
Start every SketchUp project by setting your template to “Architectural Design – Meters” or “Architectural Design – Feet and Inches” depending on your region. The default template uses a generic unit system that causes scale confusion later, especially when importing floor plans from AutoCAD or generating construction documents in LayOut.
Week 1: Interface, Navigation, and Basic Geometry
The first seven days should focus entirely on muscle memory. SketchUp’s orbit, pan, and zoom controls need to feel automatic before you attempt anything architectural. Spend at least two hours on Day 1 just navigating around a simple box, switching between perspective and parallel projection views, and using the scroll wheel to zoom to your cursor position.
Core tools to master during Week 1 include the Line, Rectangle, Circle, Push/Pull, and Move tools. The Push/Pull tool is what defines SketchUp’s modeling logic. Draw a rectangle on the ground plane, then push it up to create a volume. Draw another rectangle on a face of that volume, and push it inward to cut an opening. This is how you will model walls, windows, and door openings throughout your career with the software.
Groups and Components are the single most important organizational concept in SketchUp. Without them, every edge and face in your model sticks to every other edge and face, creating geometry chaos. A good rule: every distinct building element (a wall, a piece of furniture, a window unit) should be either a Group or a Component. Components are reusable (change one, and all instances update), while Groups are unique copies. For architectural tools in SketchUp, this distinction determines whether your model stays manageable or becomes impossible to edit at 50 hours in.
How to Set Up Your First Architectural Template
Open SketchUp, go to Window > Model Info > Units, and set your preferred measurement system. Then draw a simple ground plane at your typical site scale (a 50m x 50m rectangle works for most residential projects). Save this as a template through File > Save as Template. Every new project will now start with correct units and a reference ground plane, saving you setup time on each project.
Week 2: Architectural Modeling Techniques
With basic tools in hand, Week 2 shifts to using SketchUp for architecture in a structured way. The goal is to model a simple single-story building from a floor plan, including walls, openings, a roof, and basic interior partitions.
Start by importing a floor plan. If you have a PDF or DWG from AutoCAD, use File > Import to bring it into SketchUp. Scale the imported drawing to match real-world dimensions using the Tape Measure tool (click two known points, then type the correct distance). Once scaled, lock the plan on the ground plane inside a separate Group so you do not accidentally edit it while modeling above.
Trace over your floor plan with the Rectangle or Line tool, then Push/Pull the walls to the correct height (typically 2.7m to 3.0m for residential, 3.5m to 4.0m for commercial). Cut window and door openings by drawing rectangles on wall faces and pushing them through. This workflow is the backbone of how to use SketchUp for architecture, and it translates directly to real project work.
⚠️ Common Mistake to Avoid
Beginners often model walls as single-face surfaces with no thickness. While this looks acceptable in 3D view, it causes problems when generating sections, applying materials, or exporting to rendering software. Always model walls with real thickness (typically 150mm for interior partitions, 200-300mm for exterior walls) from the start. Fixing this later in a complex model takes significantly longer than doing it correctly the first time.
Roof modeling deserves focused practice. For a simple gable roof, draw a rectangle on top of your walls, then use the Move tool to pull the midpoint ridge line upward. For hip roofs, you will need to work with the Protractor and Rotate tools to angle each face. SketchUp does not have a dedicated roof tool like Revit, so understanding the manual geometry is essential. The comparison of 3D architectural design software on learnarchitecture.net covers where SketchUp’s manual approach fits relative to parametric alternatives.
Week 3: Plugins, Components, and Presentation
By Week 3, your basic modeling skills are solid enough to start using architecture plugins for SketchUp that accelerate production. The Extension Warehouse (Window > Extension Warehouse) is SketchUp’s official plugin marketplace. Several extensions are practically required for architectural work.
Essential Architecture Plugins for SketchUp
Profile Builder lets you create parametric wall assemblies, skirting boards, and extrusion profiles by drawing a path. Instead of manually modeling every wall layer, you define a profile cross-section once and sweep it along your floor plan lines.
1001bit Tools provides dedicated architectural operations: wall creation from lines, automatic window/door insertion, stair generation, and roof tools. For architects who find SketchUp’s native toolset too manual, 1001bit fills the gap without requiring a full BIM switch.
FredoScale and Joint Push Pull (both by Fredo6) extend SketchUp’s deformation and extrusion capabilities. Joint Push Pull is particularly useful for pushing curved or non-planar faces, which the native Push/Pull tool cannot handle.
For site modeling, Artisan adds organic sculpting tools that let you shape terrain, create berms, and model landscape contours. Combined with free terrain data from sources like Open Topography, you can build accurate site models without expensive survey software.
The guide to free CAD block sites on learnarchitecture.net lists sources where you can download ready-made furniture, fixture, and building component models for SketchUp, saving hours of modeling time.
🎓 Expert Insight
“I always tell architecture students to learn SketchUp first because it teaches you to think in 3D without the overhead of BIM data management. Once you understand spatial relationships through direct modeling, transitioning to Revit or ArchiCAD becomes much easier.” — Licensed architect with 20+ years of experience in design education
This reflects a common perspective in architecture schools where SketchUp serves as the entry point to digital design before students move into more complex BIM environments.
3D Warehouse and Component Management
SketchUp’s 3D Warehouse contains millions of free models, from Eames chairs to full building assemblies. While this is a huge time-saver, importing heavy components (50,000+ polygons) into a building model will slow your file to a crawl. Before inserting any 3D Warehouse model, check its polygon count. For furniture and fixtures, anything under 10,000 polygons works well. For trees and vegetation, look for “low-poly” or “lightweight” versions specifically tagged for architectural use.
Video: 7 Essential Tips Before Getting Started with SketchUp
TheSketchUpEssentials channel covers seven critical concepts that trip up self-taught SketchUp users, from inference locking to component axes. This is a solid companion to your Week 1 and Week 2 practice sessions.
Rhino vs SketchUp for Architecture: Which Should You Learn?
This is one of the most common questions from architecture students, and the answer depends on what you design. SketchUp excels at orthogonal, rectilinear buildings where speed and simplicity matter. Rhino, with its NURBS-based geometry engine and Grasshopper parametric plugin, is the better choice for complex curved surfaces, parametric facades, and computational design workflows.
In practice, many firms use both. SketchUp handles early massing and client presentations. Rhino takes over when the geometry demands free-form surfaces or algorithmically generated patterns. If your studio work involves conventional residential or commercial projects, SketchUp will cover 90% of your modeling needs. If you are drawn to parametric or organic architecture, investing in Rhino alongside SketchUp gives you a wider range.
| Feature | SketchUp | Rhino |
|---|---|---|
| Learning curve | Low (days to basic proficiency) | Medium-high (weeks to months) |
| Geometry type | Polygonal mesh | NURBS surfaces |
| Best for | Rectilinear buildings, quick massing | Curved forms, parametric design |
| Parametric tools | Limited (via plugins) | Grasshopper (built-in) |
| 2D documentation | LayOut (integrated) | Requires export to CAD |
| Pricing (annual) | Free version available; Pro ~$349/yr | ~$995 perpetual license |
Pricing is approximate and may vary by region and licensing type. Check sketchup.com and rhino3d.com for current rates.
Week 4: SketchUp and LayOut for Architecture Documentation

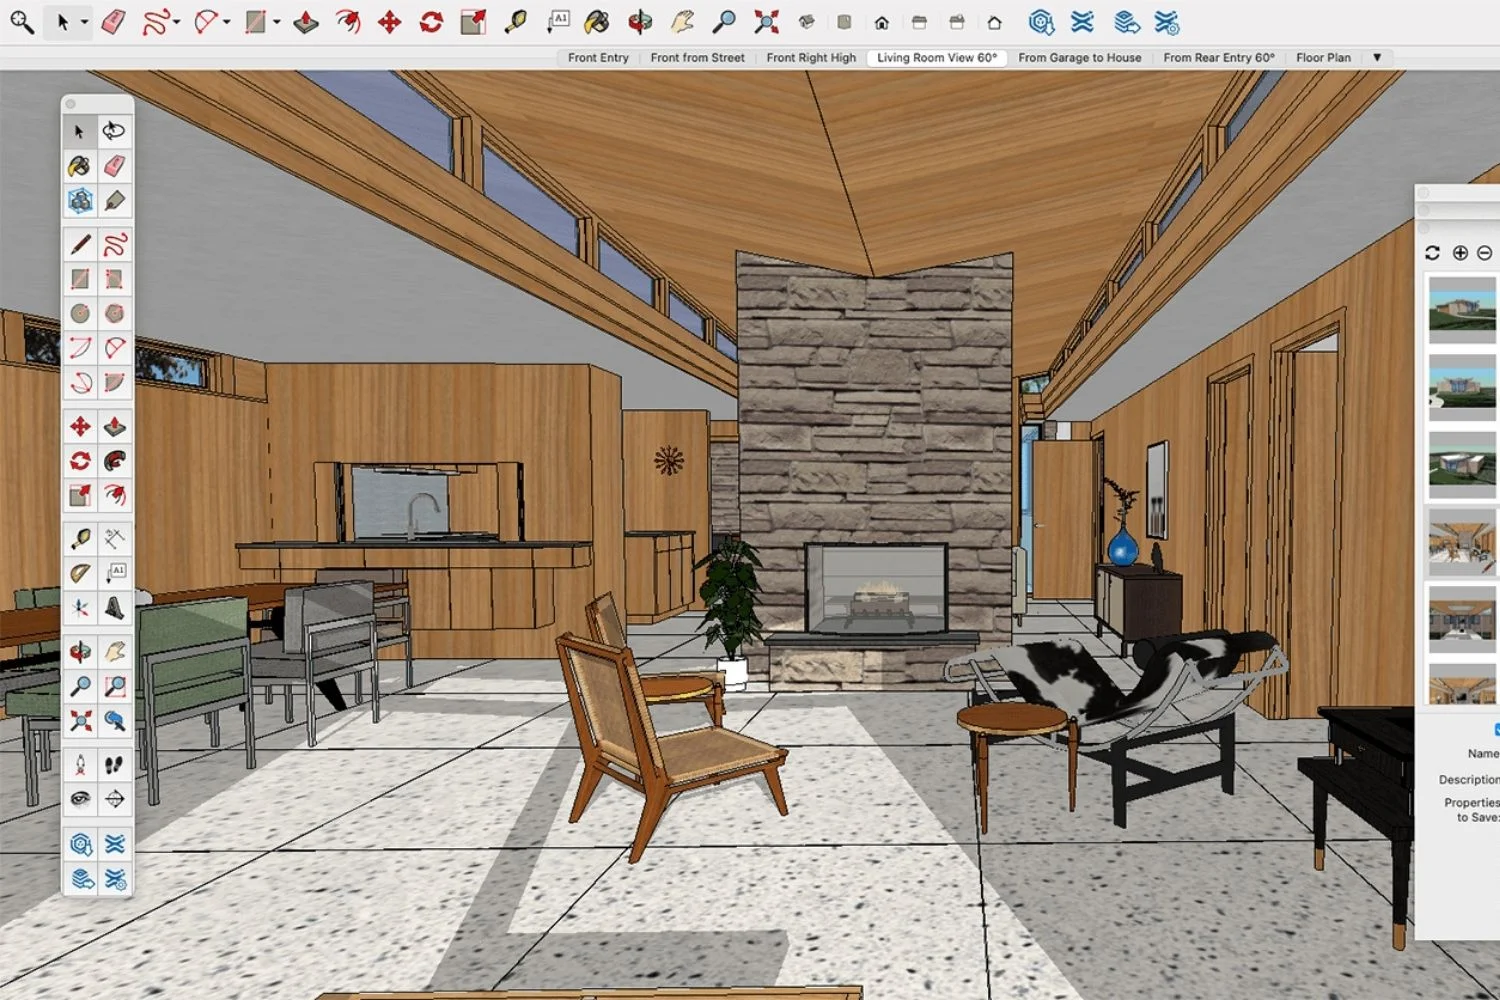
The final week ties everything together. SketchUp and LayOut for architecture is the workflow that turns your 3D model into presentation boards, construction documents, and client deliverables. LayOut is SketchUp Pro’s companion application for 2D output, and learning it is what separates casual SketchUp users from professionals who produce real project documents.
In LayOut, you create viewports linked to scenes in your SketchUp model. A scene is a saved camera position with specific layer visibility, style, and section cut settings. Set up scenes in SketchUp for each view you need: floor plans (using section cuts at 1.2m height), elevations (using parallel projection from each cardinal direction), sections, and 3D perspectives. Each scene becomes a viewport in LayOut, where you add dimensions, annotations, title blocks, and drawing borders.
The key advantage of this system is that changes in the SketchUp model automatically update in LayOut. Move a wall in 3D, and your floor plan, elevation, and section views all reflect the change. This linked workflow approaches BIM-level coordination, though without the embedded object data that Revit or ArchiCAD provides.
💡 Pro Tip
Name your SketchUp scenes with a clear prefix system: “FP-” for floor plans, “EL-” for elevations, “SEC-” for sections, and “3D-” for perspective views. This naming convention keeps your LayOut file organized, especially on multi-story projects where you might have 20+ scenes feeding into a drawing set.
Rendering Options for SketchUp Architects
SketchUp’s native rendering is limited to basic styles (watercolor, sketch lines, monochrome). For photorealistic output, you need a rendering plugin or external application. The most common options for architects include V-Ray, Enscape, Lumion, and D5 Render. Each connects to SketchUp through a plugin that reads your model geometry and materials in real time.
Lumion offers one of the fastest rendering workflows for SketchUp users. Its LiveSync feature creates a live connection between your SketchUp model and the Lumion viewport, so changes appear instantly. Enscape provides a similar real-time experience with a lighter interface. V-Ray delivers the highest image quality but requires more setup time and rendering knowledge.
AI-powered rendering tools have also entered this space. Platforms like Veras and MyArchitectAI can generate styled visualizations from SketchUp geometry using text prompts. The roundup of AI visualization tools for architects covers how these newer options compare to traditional renderers in terms of quality, speed, and cost.
📌 Did You Know?
SketchUp’s 3D Warehouse is one of the largest free 3D model libraries in the world, hosting over 4 million models. The platform receives contributions from individual users, furniture manufacturers, and even architecture firms who upload completed building models. Many manufacturers like Herman Miller and Kohler publish accurate product models directly on 3D Warehouse, letting architects place spec-correct fixtures into their designs at no cost.
SketchUp Alternatives for Architecture

If you have tried SketchUp and found it limiting for your project type, several alternatives address specific gaps. Affordable 3D modeling tools like Blender and BricsCAD offer different strengths depending on your workflow.
Blender is free and open-source, with far more powerful modeling, sculpting, and rendering capabilities than SketchUp. Its architecture community has grown significantly, and addons like Archipack and BlenderBIM bring architectural workflows into the platform. The trade-off is a steeper learning curve and an interface designed for generalists rather than architects specifically.
For firms that need BIM but prefer SketchUp’s modeling logic, Trimble Connect bridges SketchUp models into a collaborative BIM environment. SketchUp Studio also includes IFC import/export, which allows basic interoperability with Revit and ArchiCAD project files.
✅ Key Takeaways
- SketchUp for architecture is best learned in structured weekly blocks: navigation first, then modeling, plugins, and finally LayOut documentation.
- Groups and Components are the foundation of an organized SketchUp model. Skipping this step creates geometry problems that compound over time.
- Architecture plugins like Profile Builder, 1001bit Tools, and Artisan fill gaps in SketchUp’s native toolset for professional architectural work.
- The SketchUp-to-LayOut pipeline produces linked 2D documentation (plans, sections, elevations) that updates automatically when you change the 3D model.
- For photorealistic rendering, connect SketchUp to V-Ray, Enscape, Lumion, or newer AI rendering platforms depending on your speed and quality requirements.
FAQ
Is SketchUp good enough for professional architecture?
Yes. Many small and mid-sized firms use SketchUp Pro with LayOut as their primary design and documentation platform, particularly for residential and small commercial projects. It lacks the embedded data management of BIM tools, but the SketchUp-to-LayOut workflow produces professional construction documents. Larger firms often use SketchUp for concept design alongside Revit for documentation.
Can I learn SketchUp for architecture without any prior CAD experience?
SketchUp is one of the most accessible 3D tools available, and prior CAD experience is not required. Its push-pull modeling approach is intuitive enough that complete beginners can produce recognizable building forms within a few hours. Structured practice over 30 days, as outlined above, is enough to reach a working level of proficiency for studio or office use.
What are the best free architecture plugins for SketchUp?
The most useful free plugins include 1001bit Tools (basic version), CleanUp3 for fixing geometry issues, Eneroth Open Newer Version for file compatibility, and Solar North for shadow studies. The Extension Warehouse lists free and paid options clearly, and most paid plugins offer trial periods so you can test before committing.
How does SketchUp compare to Revit for architecture students?
SketchUp teaches spatial thinking and quick 3D visualization. Revit teaches BIM methodology, data management, and professional documentation standards. Most architecture programs introduce SketchUp in early studios and Revit in later, technically focused courses. Learning SketchUp first builds a strong 3D foundation that makes picking up Revit or other professional design tools faster.
What computer specs do I need to run SketchUp for architecture?
SketchUp runs well on most modern computers. Minimum requirements include 4 GB RAM (8 GB or more recommended), a dedicated graphics card with OpenGL 3.1 support, and at least 1 GB of available disk space. For complex architectural models with rendering plugins, 16 GB RAM and a mid-range NVIDIA or AMD GPU will provide a much smoother experience. Check Trimble’s official system requirements for the latest specifications.


Leave a comment