

Table of Contents Show
Photorealistic interiors in Lumion start with a well-prepared 3D model and build through layered decisions about materials, lighting, camera placement, and render effects. This guide walks you through each stage of the process so you can turn a basic interior scene into a render that looks like a real photograph.
Lumion has become one of the most popular tools for photorealistic interior rendering among architects and visualization professionals. Its real-time feedback loop means you see the impact of every change instantly, which speeds up decision-making and cuts revision cycles. But getting truly realistic results requires more than dragging a few sliders. You need to understand how light behaves indoors, how materials interact with that light, and how camera settings and post-processing effects tie everything together. The steps below cover the full workflow, from importing your model to exporting a final image that holds up under close inspection.
Preparing Your 3D Model for Lumion Import
The quality of your photorealistic interior render in Lumion depends heavily on what happens before you open Lumion. A poorly organized model creates problems that no amount of post-processing can fix. Start by cleaning up your geometry in your modeling software, whether that is SketchUp, Revit, or 3ds Max. Remove hidden faces, close open edges, and delete any geometry that will not be visible in the final render. Interior scenes are especially sensitive to stray geometry because it can cast unexpected shadows or interfere with light calculations.
Assign basic materials in your modeling software before importing. Even placeholder colors help because Lumion maps its own materials based on the names and groupings you set up. Organize layers or groups by material type (walls, floor, ceiling, glass, furniture) so you can quickly select and reassign materials inside Lumion. Export using a format Lumion reads well: .DAE (Collada) from SketchUp or .FBX from Revit and 3ds Max tend to produce the cleanest imports.
💡 Pro Tip
Before importing, scale your model to real-world dimensions. Lumion’s lighting engine calculates light falloff based on actual distance, so a room modeled at 1:100 scale will produce completely wrong light behavior. A quick test: place a Lumion person object next to your furniture. If the proportions look off, your scale needs adjusting.
How to Set Up Realistic Interior Lighting in Lumion
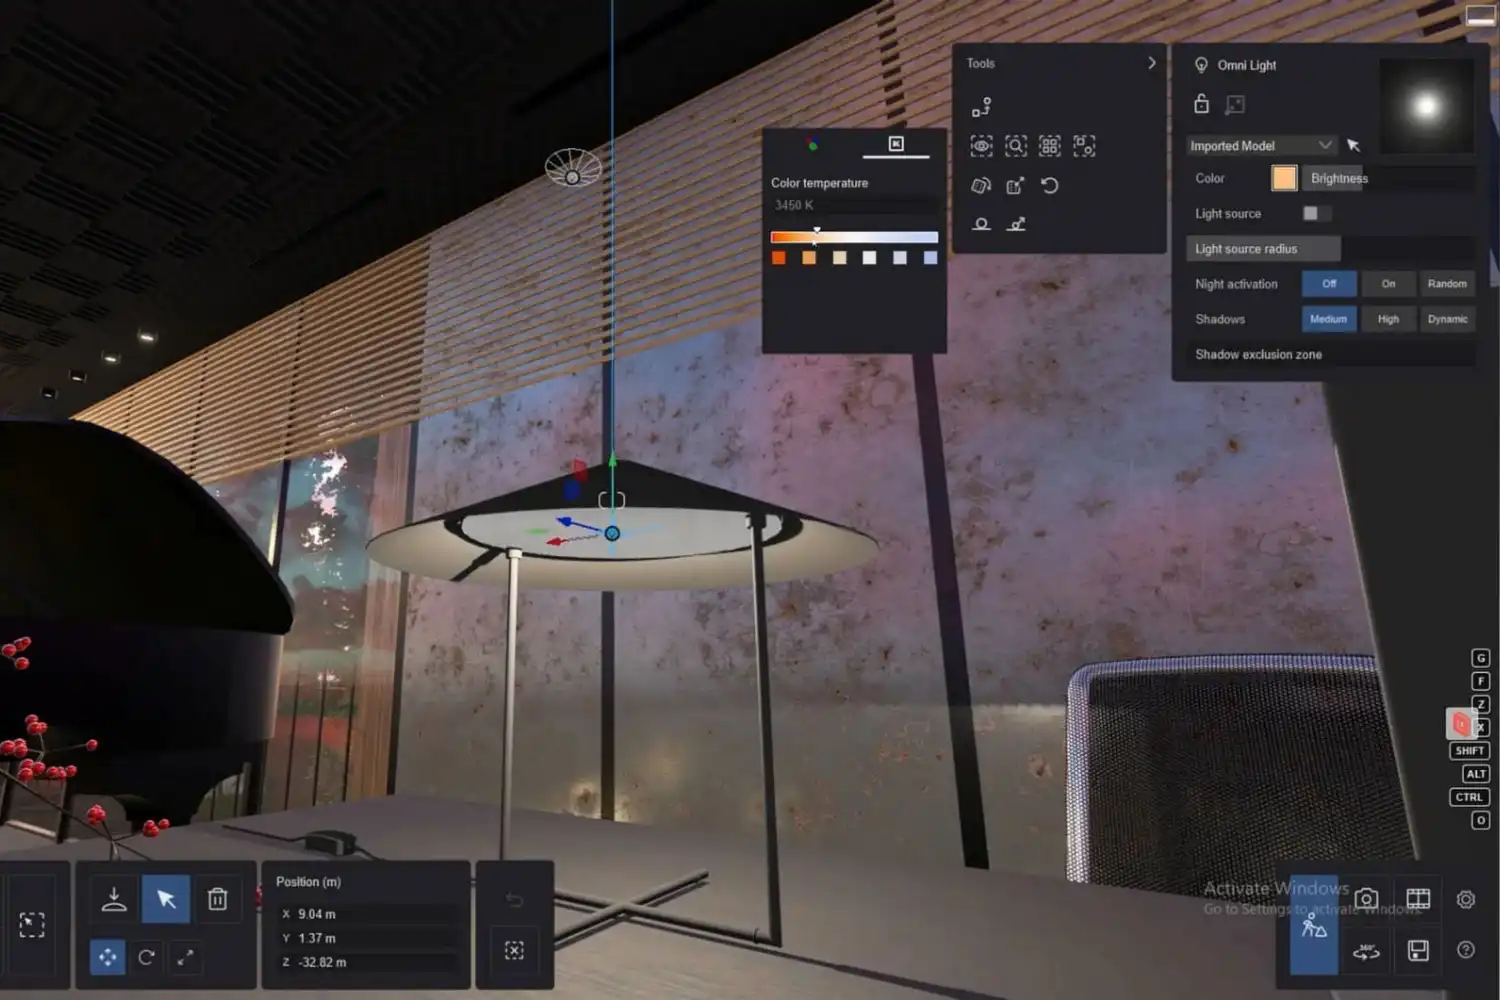
Lighting is the single most important factor in a convincing interior render. Lumion handles interior lighting through a combination of the built-in sun/sky system and placed light objects. Start by positioning the sun. For interior scenes, the sun angle determines how much natural light enters through windows and doors. A lower sun angle (morning or late afternoon) creates longer light rays that stretch across floors and walls, adding depth and warmth to the scene.
Next, place spotlight and area light objects inside the room. Area lights simulate soft, diffused sources like ceiling panels or indirect fixtures. Spotlights work for recessed downlights, pendant lamps, and accent lighting. Pay attention to color temperature: warm lights (around 2700K to 3000K) feel residential and inviting, while cooler temperatures (4000K and above) suit office or commercial interiors.
Avoid flooding the room with too many light sources at maximum intensity. Real interiors have areas of brightness and shadow. That contrast is what makes a render feel real. Dial back individual light intensities and let shadows form naturally. If your scene has large windows, the sun should be your primary light source, with artificial lights acting as fill.
⚠️ Common Mistake to Avoid
Many beginners set every light source to full brightness, which removes shadows and makes the scene look flat. In reality, interior spaces have a range of light levels. Turn down ambient light, reduce individual fixture intensities to 30-60% of their maximum, and let the sun do the heavy lifting through windows. The resulting contrast is what gives depth to photorealistic renders.
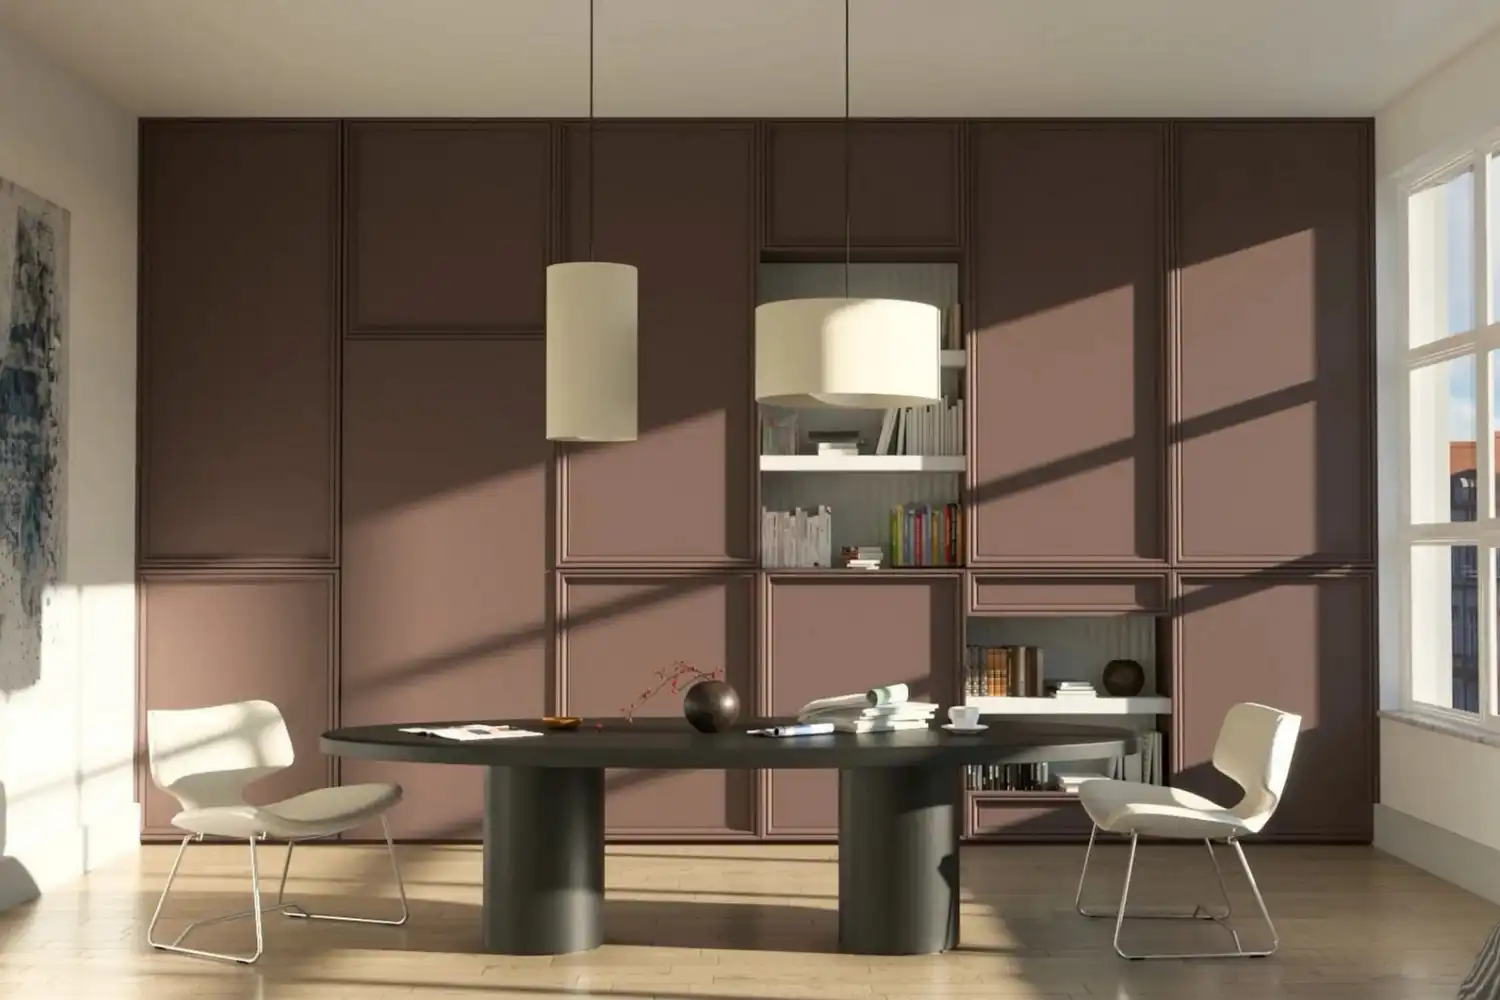
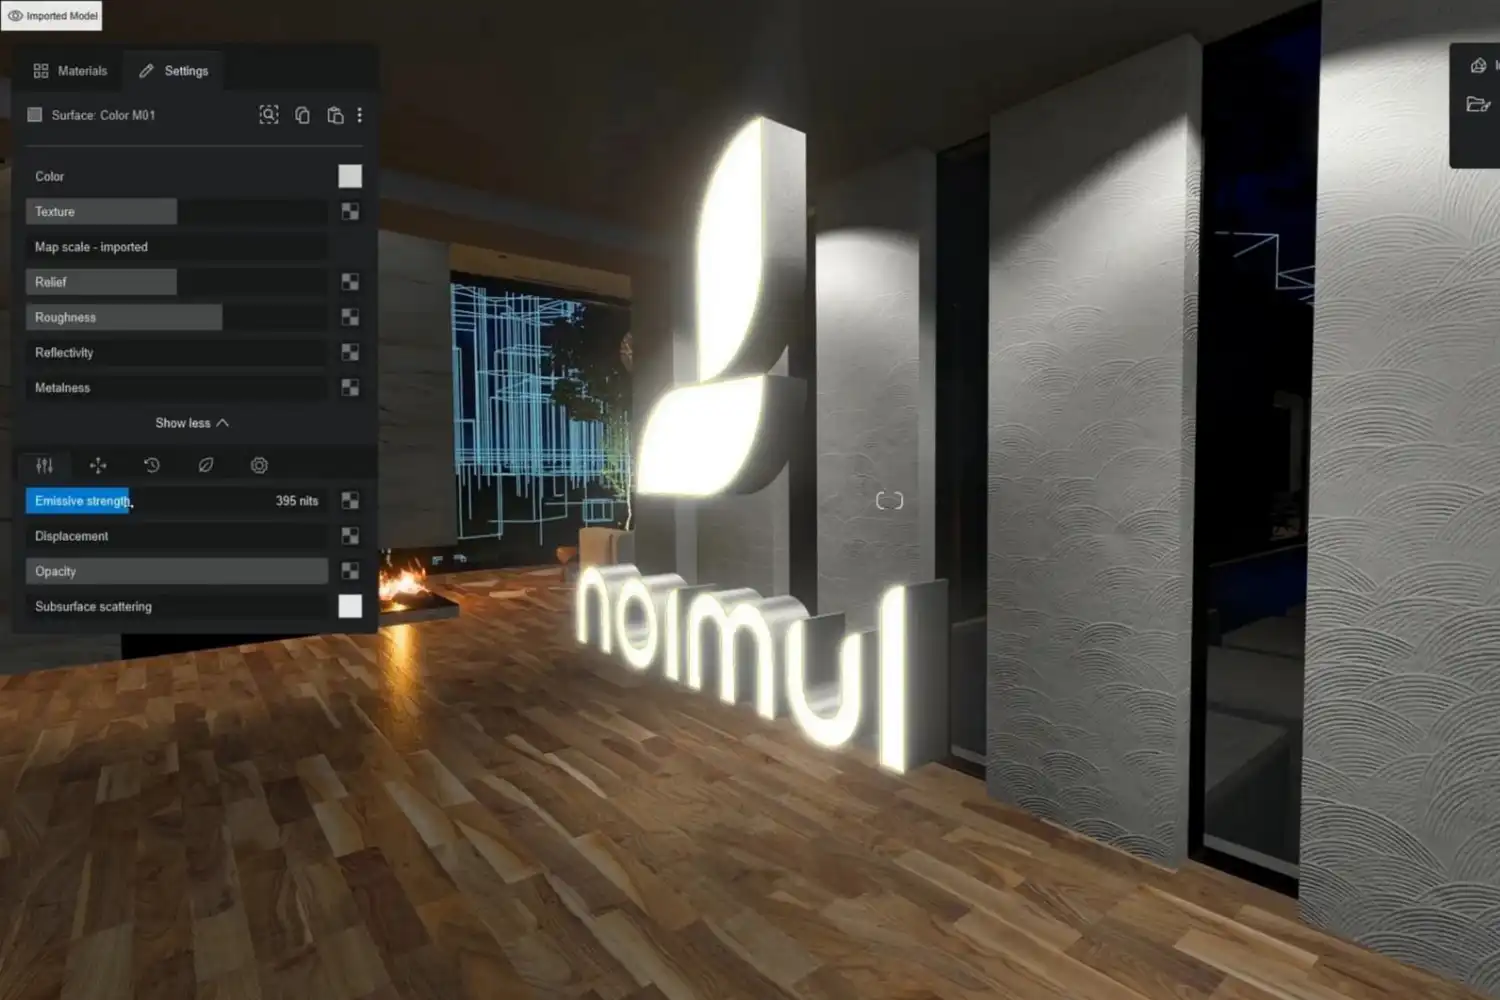
Applying and Fine-Tuning Interior Materials
Materials are the second pillar of photorealism. Lumion’s built-in material library includes thousands of options, but applying them correctly matters more than choosing expensive-looking textures. For each surface, consider three properties: color/albedo, reflectivity, and roughness. A polished marble floor should have high reflectivity and low roughness. A matte plaster wall needs low reflectivity and high roughness. Getting these values right is what separates a render that looks like a video game from one that looks like a photograph.
Use Lumion’s material editor to adjust scale. A common problem in Lumion interior rendering is textures that appear either too large or too small. Wood planks that are 2 meters wide or tile grout lines that are paper-thin immediately break the illusion. Reference real product dimensions: standard hardwood planks are typically 90mm to 190mm wide, and common floor tiles run 300mm x 300mm to 600mm x 600mm.
For soft furnishings like sofas, curtains, and rugs, bump and normal maps add the surface detail that catches light realistically. Lumion’s newer versions include weathering and aging sliders for some materials. A slight amount of wear on a wooden floor or a subtle color variation across wall paint adds the imperfection that real surfaces have.
📐 Technical Note
For physically accurate glass in Lumion, set the Index of Refraction (IOR) to 1.52, which matches standard float glass. Reduce opacity to around 5-15% for clear glazing, and enable reflections. If you are rendering double-glazed windows, the slight green tint visible at the glass edge can be simulated by adding a very subtle green to the glass color channel.
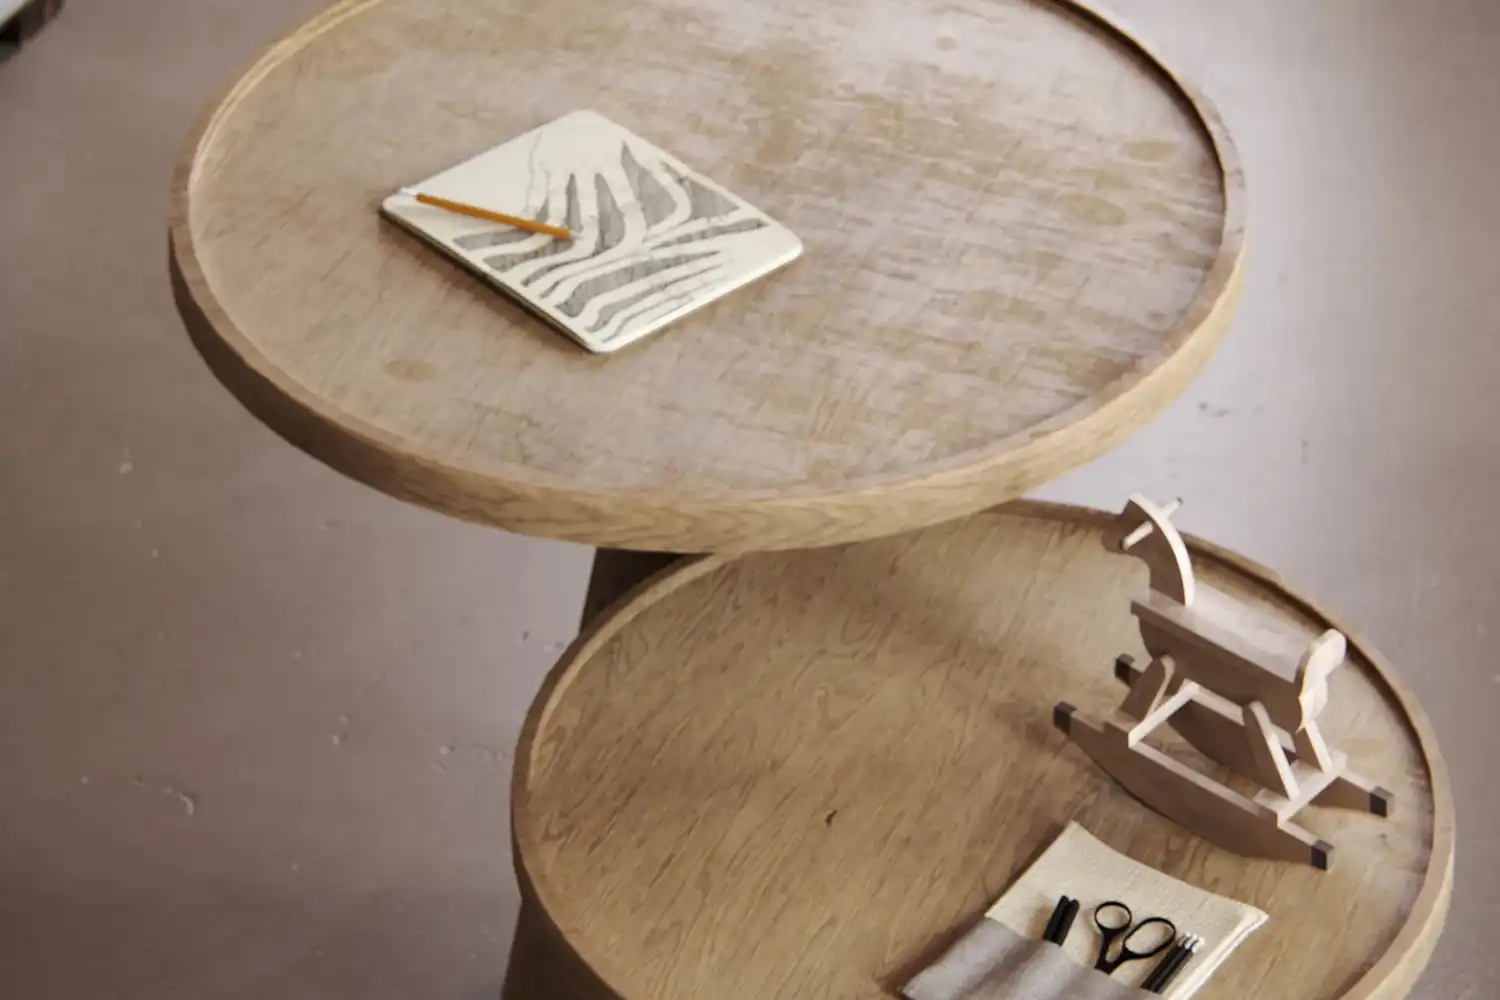
Furnishing and Detailing Your Interior Scene
An empty room with perfect lighting and materials will still look artificial. Photorealism requires the clutter and detail of real life. Lumion’s object library contains furniture, plants, books, kitchen items, bathroom accessories, and decorative objects. Place these strategically, not randomly.
Follow basic interior design composition rules. Group objects in odd numbers (three vases, five books). Layer different heights on shelves. Add a slightly rumpled throw blanket on a sofa or an open book on a coffee table. These small touches tell a story and signal to the viewer’s brain that a real person lives in this space.
Plants are particularly effective. A tall fiddle leaf fig in a corner, a small succulent on a windowsill, and some trailing ivy on a shelf add organic shapes that break up the hard geometry of architecture. Lumion’s plant library includes high-polygon models that hold up at close range.
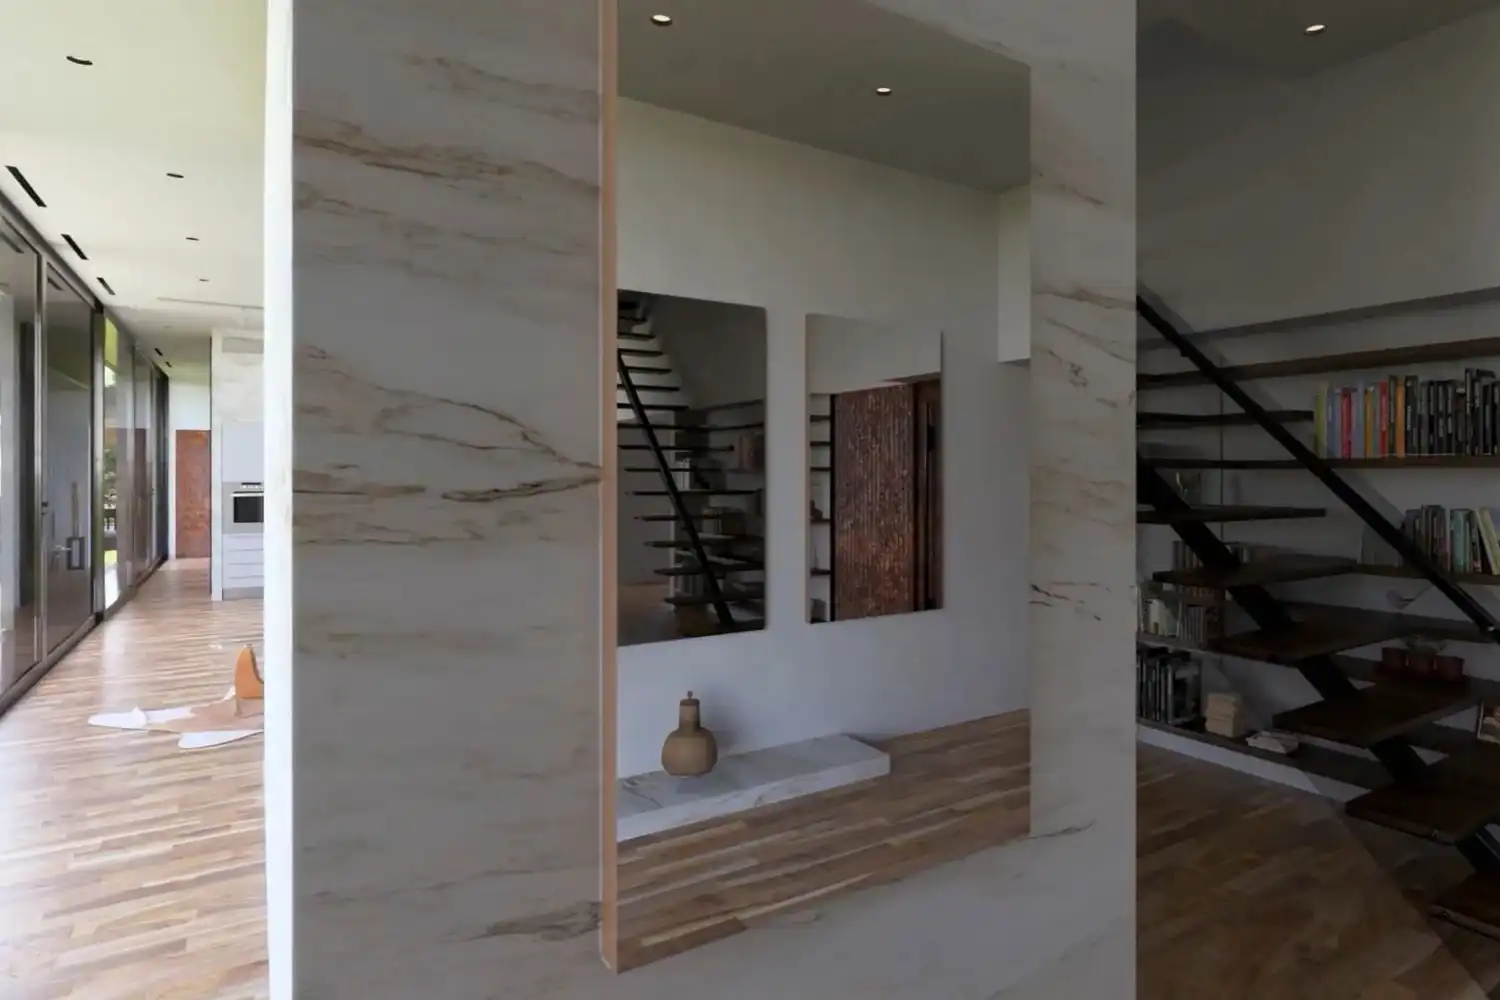
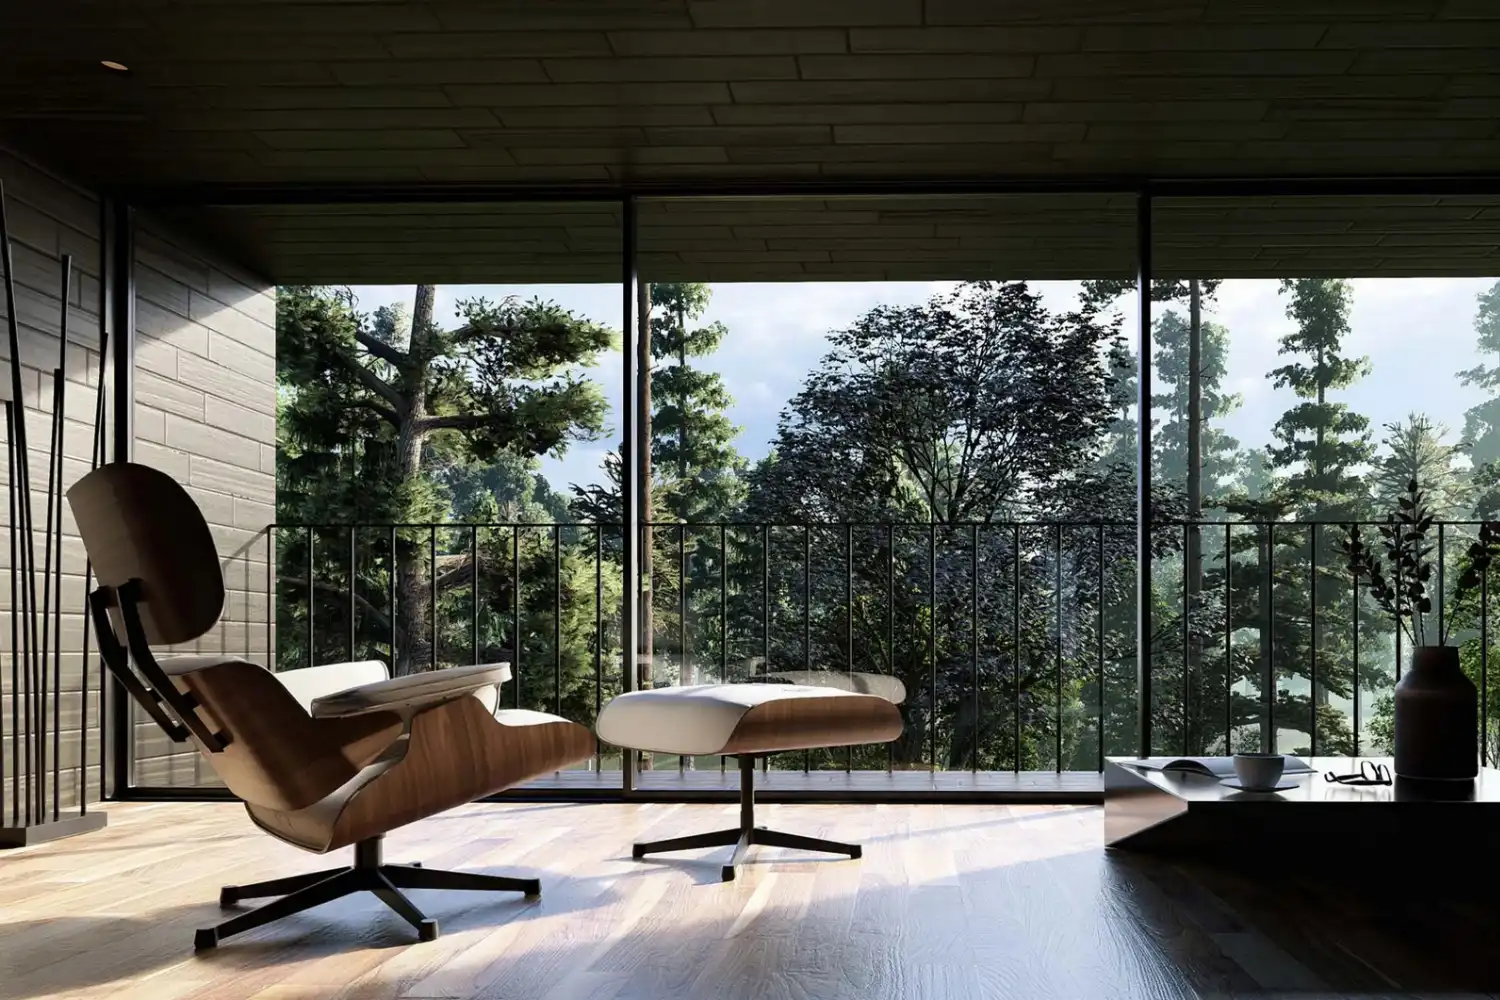
Camera Placement and Composition
Where you place the camera defines the entire image. For interior renders, position the camera at eye height (approximately 1.1 to 1.5 meters from the floor). Lower angles create a sense of grandeur, while higher angles feel more documentary. Avoid placing the camera in the exact center of the room, which produces a flat, symmetrical image. Instead, offset it slightly to create a more dynamic composition with overlapping planes.
Use the two-point perspective mode in Lumion to keep vertical lines straight. One-point perspective (where you look straight down a corridor or at a focal wall) creates strong depth. Three-point perspective (looking up or down) can feel dramatic but is harder to control in interior scenes.
Set the field of view (FOV) between 50mm and 80mm equivalent for interior photography. Wider angles (24mm to 35mm) capture more of the room but can distort edges. If you go wide, enable Lumion’s lens distortion correction to keep the image clean. Focus on one strong focal point: a fireplace, a dining table, or a window view.
💡 Pro Tip
Professional architectural photographers often shoot interiors from doorways or transitional spaces, framing the room through an opening. Replicate this in Lumion by placing the camera just inside a door frame or archway. The foreground frame adds depth and context that a mid-room shot cannot achieve.
Render Effects Stack for Photorealistic Results
Lumion’s render effects are where you pull the image together. The order and intensity of these effects matter. Start with the essentials and add effects one at a time, checking the preview after each addition.
Sky and Weather: Even for interiors, the sky affects the light quality coming through windows. Overcast skies produce soft, even light. Clear skies with a visible sun create sharper shadows. Match the sky to the mood you want.
Shadow settings should use “high” or “ultra” quality for interior scenes. Interior shadows are close to the camera, so any artifacts or blocky edges will be obvious. Enable soft shadows for a natural falloff.
Color correction is your most powerful finishing tool. Adjust exposure first, then work on contrast and saturation. A common approach for residential interiors: slightly warm the color temperature, reduce saturation by 5-10% (oversaturated renders look artificial), and add a subtle vignette to draw the eye toward the center of the image.
Depth of field simulates the bokeh effect of a real camera lens. For interior renders, use a moderate aperture (f/4 to f/8 equivalent) with the focus point on your main subject. Too much blur looks gimmicky; a slight softening of foreground and background elements is enough.
If your version of Lumion supports ray tracing, enable it for glass and reflective surfaces. Lumion 2024 and newer versions include real-time ray tracing that significantly improves reflections in mirrors, polished floors, and glass partitions.
🎓 Expert Insight
“The difference between a good render and a great one is always restraint. The best architectural visualizers use fewer effects at lower intensities.” — Nuno Silva, Architectural Visualization Specialist
This principle applies directly to Lumion’s effect stack. Stacking bloom, lens flare, chromatic aberration, and heavy color grading on top of each other creates an overprocessed look. Apply each effect at 20-40% intensity and build up gradually.
Video: 7 Steps for a Realistic Interior Render in Lumion
This tutorial by Nuno Silva walks through a complete interior rendering workflow in Lumion, covering lighting setup, material adjustments, and the specific render effect settings that produce photorealistic results.
Exporting and Post-Processing Your Final Render
Once your effects stack looks right in the preview, set the output resolution. For portfolio and client presentations, render at minimum 3840 x 2160 (4K). Lumion’s photo mode offers quality presets from one star to five stars. Five-star quality takes longer but produces cleaner shadows and smoother gradients. For Lumion’s latest rendering features, the difference between three-star and five-star is significant in interior scenes because of the close proximity of surfaces to the camera.
Save your render as a PNG file for lossless quality. If you plan to do additional post-processing in Photoshop or Lightroom, render at the highest resolution and adjust exposure and color correction externally rather than baking heavy effects into the Lumion output. This gives you more flexibility during revisions.
Post-processing in an image editor can add the final 5-10% of realism. Adjust levels and curves to fine-tune contrast. Add a very subtle grain effect (1-2% noise) to break up the digital smoothness that renders tend to have. Real photographs always have some grain from the camera sensor, and this small addition helps your render pass as a photo.
What Makes Lumion Stand Out for Interior Visualization?
Compared to offline renderers like V-Ray or Corona, Lumion’s strength is speed. A render that takes minutes in Lumion might take hours in a CPU-based renderer. This speed lets you iterate faster: test five different lighting setups, three color palettes, and two furniture arrangements in the time it would take to complete a single V-Ray render. For architectural visualization workflows where client feedback drives frequent changes, that speed advantage is significant.
Lumion also handles large scenes efficiently. You can populate an interior with hundreds of objects from the built-in library without the scene becoming unworkable. The LiveSync feature connects directly to modeling software, so changes in your SketchUp or Revit model update in Lumion in real time. This integration is particularly useful during design development when the interior layout is still evolving.
⚖️ Pros & Cons at a Glance
✔️ Pros: Fast render times, real-time preview, large built-in library, easy learning curve
✖️ Cons: GPU-dependent performance, Windows only, less material control than V-Ray, subscription pricing
FAQ
What are the best Lumion settings for photorealistic interior renders?
Use five-star render quality, enable ray tracing for glass and reflective surfaces, set shadow quality to high or ultra, and apply color correction with slightly warm tones and reduced saturation. Keep depth of field subtle, and render at 4K resolution for the best detail.
How long does it take to render an interior scene in Lumion?
A single 4K interior image at five-star quality typically takes 2 to 10 minutes depending on your GPU, scene complexity, and the number of effects enabled. Ray tracing adds to render time. A mid-range setup with an NVIDIA RTX 3070 or equivalent usually completes a detailed interior render in about 5 minutes.
Can Lumion produce results as realistic as V-Ray for interiors?
Lumion has closed the gap significantly with ray tracing support and improved material systems. For client presentations and social media, Lumion renders can match V-Ray quality. For print-resolution marketing materials or extreme close-ups where material detail matters most, V-Ray still offers finer control over shader parameters and light bounces.
What GPU do I need for photorealistic Lumion interior rendering?
Lumion recommends a minimum of 6 GB VRAM, but for photorealistic interiors with ray tracing, an NVIDIA RTX 3060 Ti or better is practical. Cards with 8 GB or more VRAM (RTX 4070, RTX 4080) handle complex interior scenes with large textures and multiple light sources more smoothly. Check Lumion’s official hardware recommendations for the most current specifications.
How do I fix grainy or noisy interior renders in Lumion?
Grain in interior renders usually comes from insufficient light sampling. Increase the render quality to four or five stars, which gives Lumion more time to calculate accurate lighting. If grain persists, add more light sources to reduce dark areas where noise concentrates. Enabling NRD (NVIDIA Real-Time Denoisers) in supported versions also helps clean up noise in shadow regions.


Leave a comment